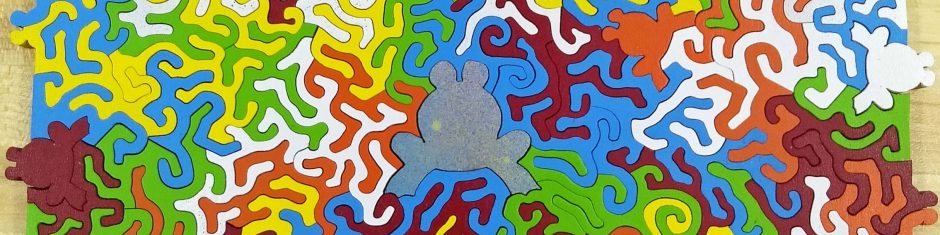
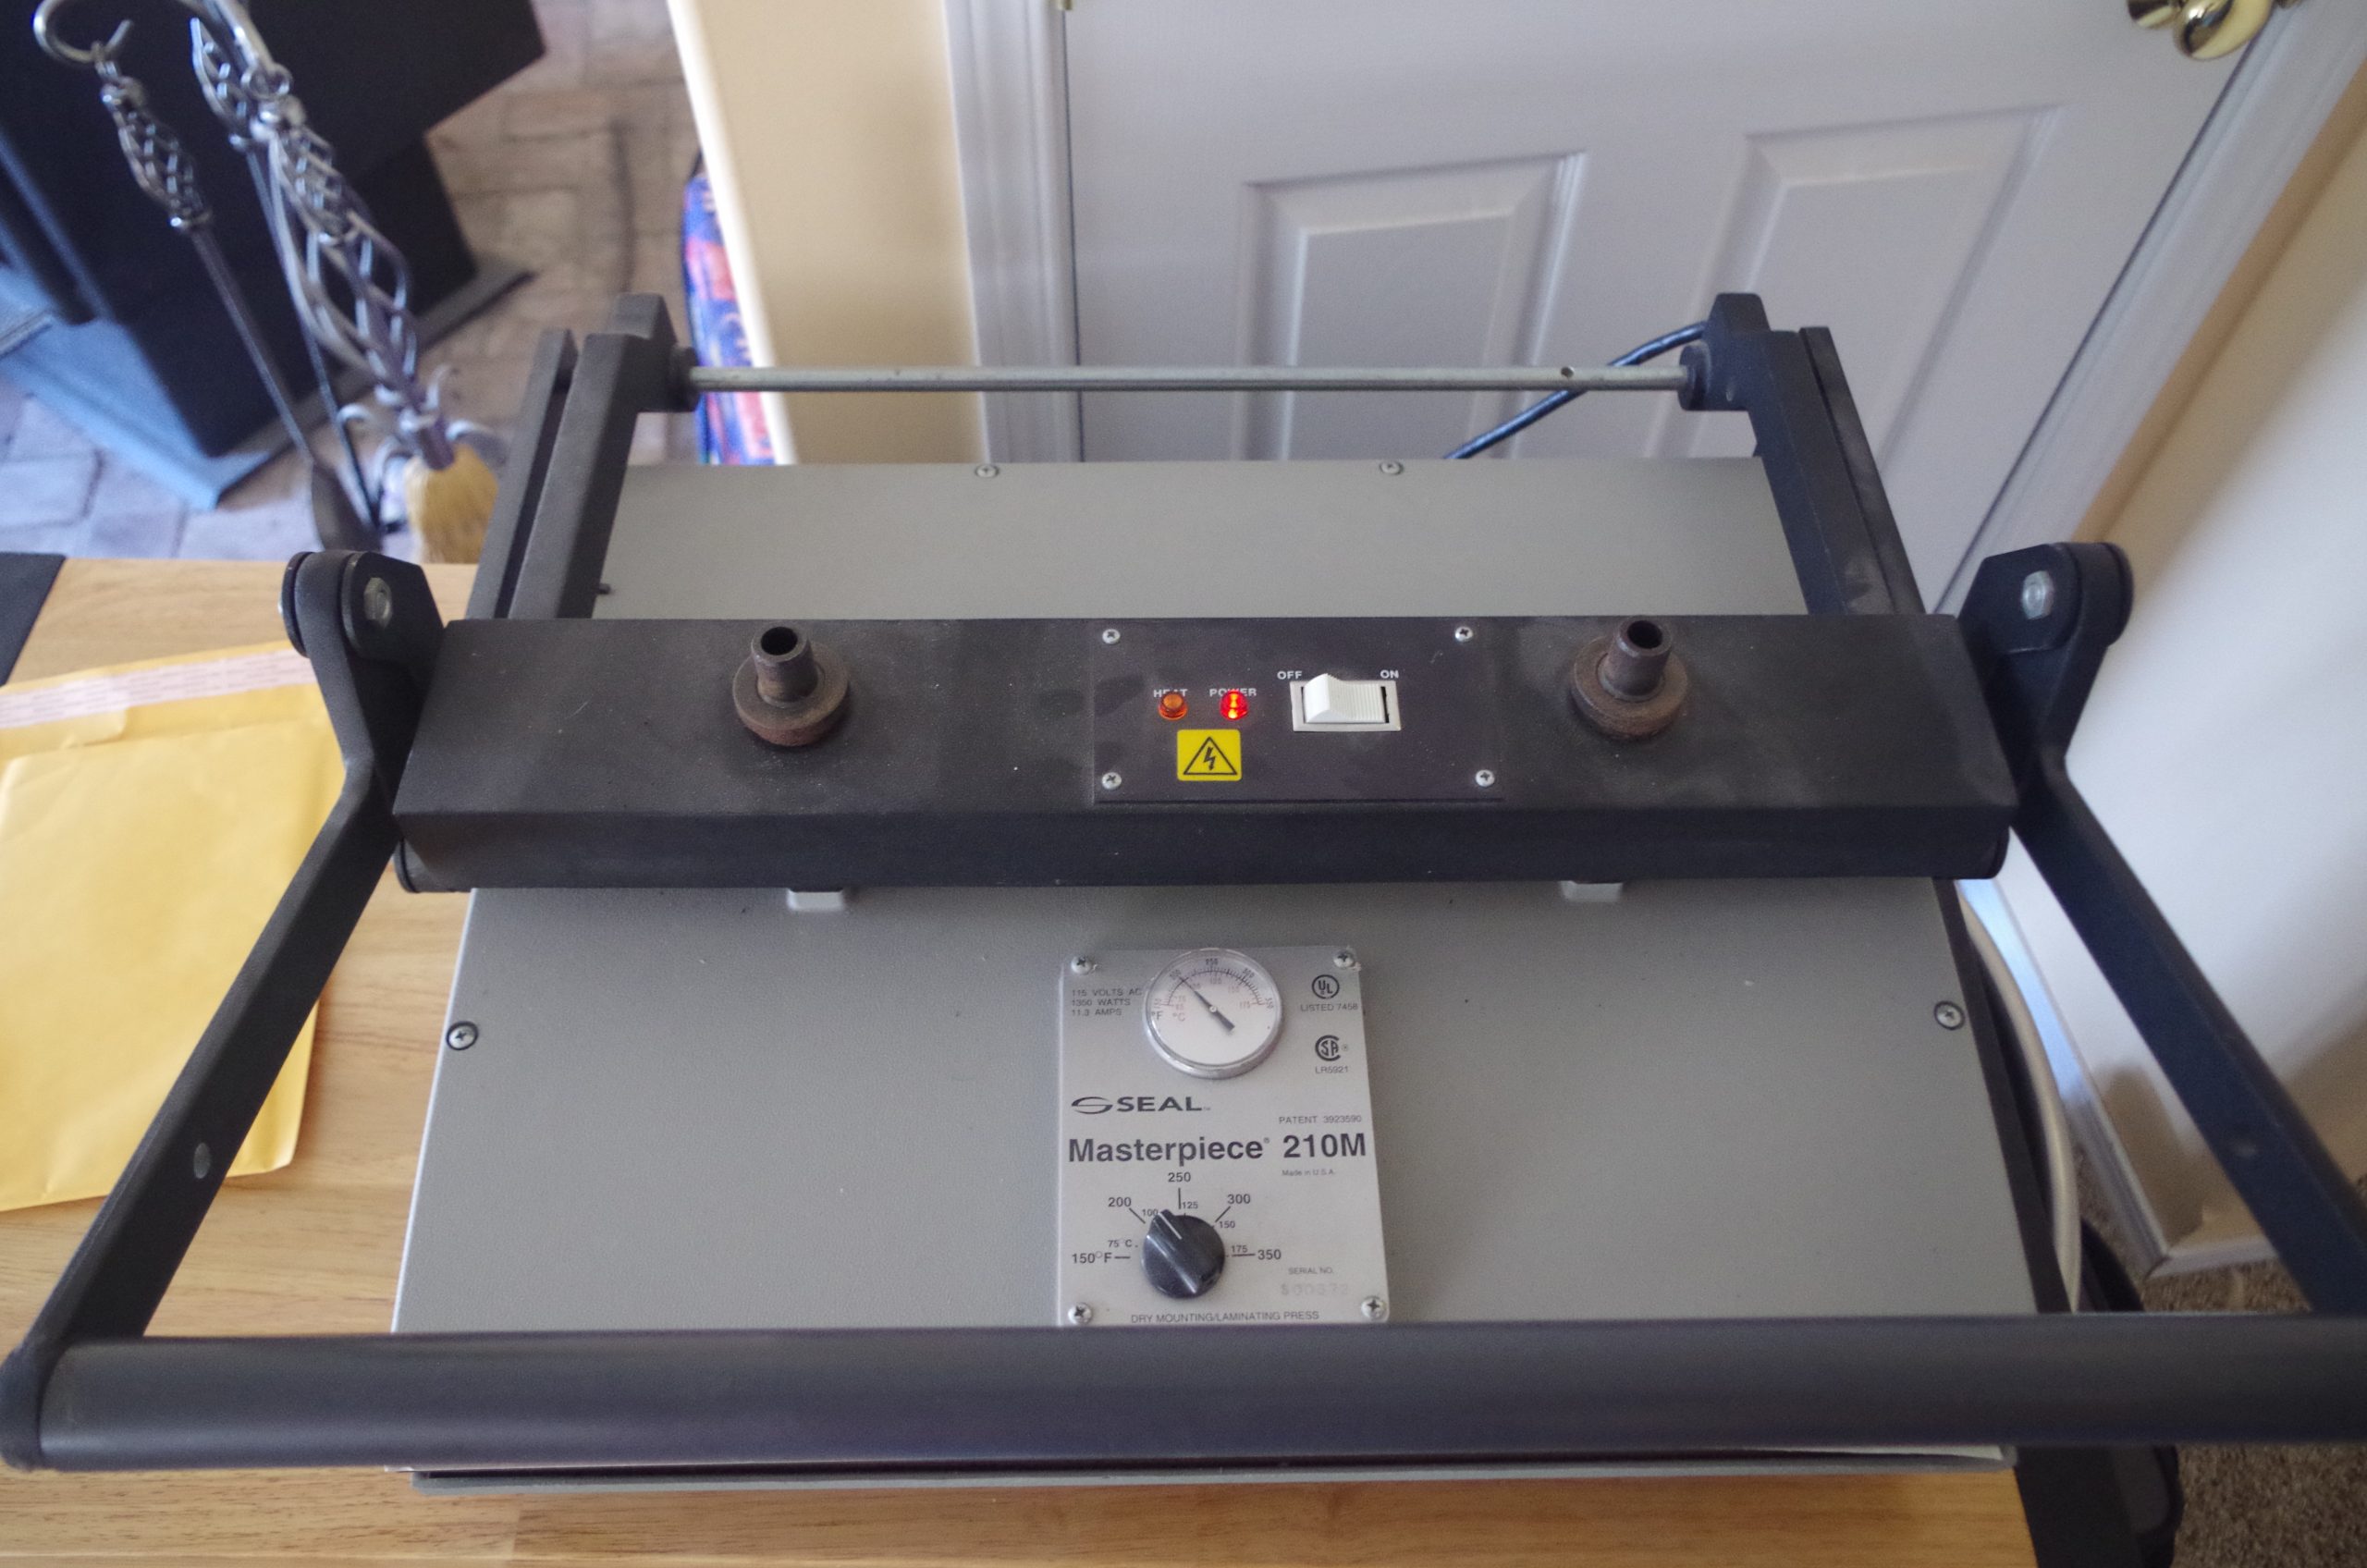
In this post, I will discuss some issues I have encountered with my dry mount press. I will also review the manufacturer recommended maintenance on these. My particular press is a Seal Masterpiece 210M. This unit was designed for mounting images to a substrate up to 1″ thick. A picture of it is below.
This is an older unit (30+ years), but new ones are listed for sale on numerous sites such as Artgrafix, Blick Art Materials or B&H Photo. The company has changed names to Bienfang and then to D&K, who is selling them under the “Expression” brand. A new one lists for around $2500 and up plus shipping and sales tax. I found mine on eBay 12 years ago for a lot less money. I just did a quick perusal of current eBay listings, and they run from $300 to $800. Spare parts are available if needed.
This model has a platen size of 18.5″ deep (front to back) and 23″ wide. Other models of this exist with different size platens. On this model, there are two adjustment screws on either side of the on/off switch and indicator lights. These are for adjusting the clamping pressure. The smaller models only have one pressure adjustment screw.
You can use this to mount larger materials in multiple passes. You can manage something up to 23″ wide and as long as you want if you support the amount protruding out the front and the back. I have done this with a couple of larger puzzles that were 16″ x 24″.
To achieve a successful image mount, the standard mantra is that you need to limit moisture present in the materials, use the correct temperature for the adhesive and the image, and apply the correct pressure for the correct amount of time. I will add to this that you need to ensure the back of the image is not too slippery or contaminated with a slippery substance. I strongly encourage reading the applicable sections of a book entitled “The Mounting and Laminating Handbook“, 3rd edition, by Chris A Paschke.
Temperature and pressure are functions of the press, the other items depend on operator technique.
Temperature Control
Temperature control is the first issue I want to address. I had a series of puzzles where I had problems with the image peeling from the wood. The paper itself was not delaminating, but the adhesive was failing. After several bouts of extreme frustration, I discovered that the temperature gauge on the unit was reading higher than the actual temperature as measured by other devices. This meant my adhesive was not adequately activating.
When the press is first turned on, you have both indicator lights on.
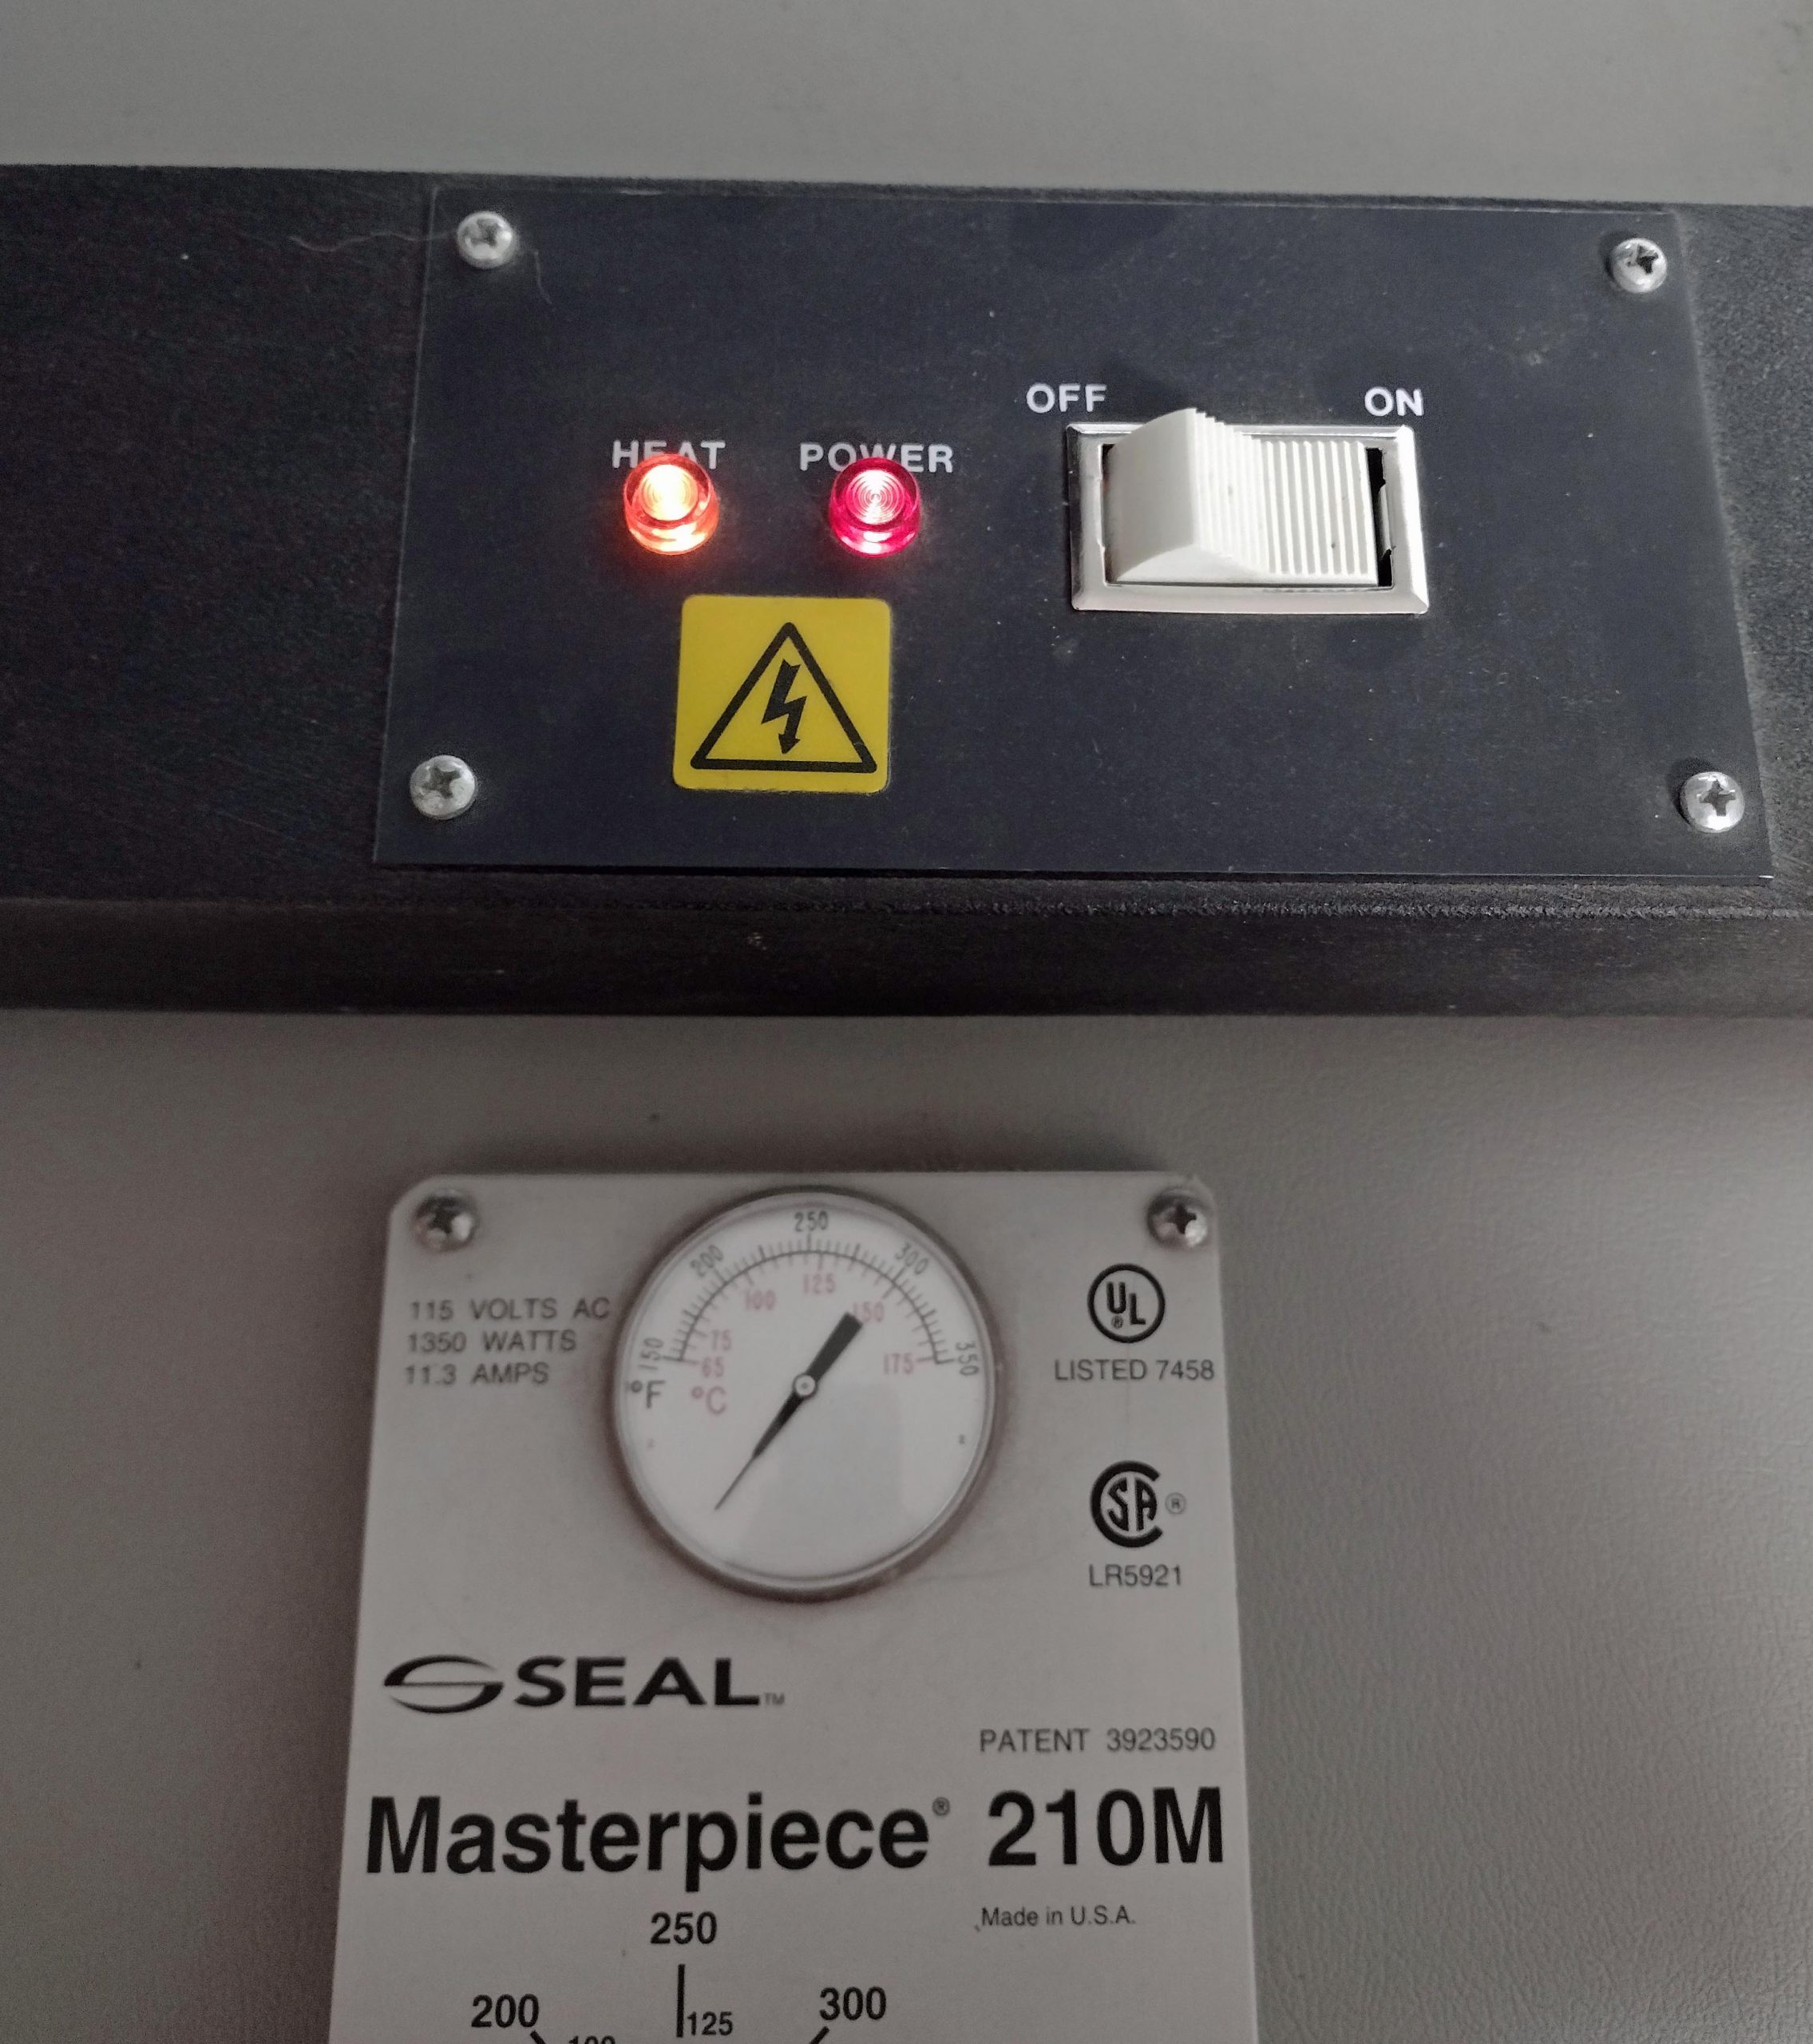
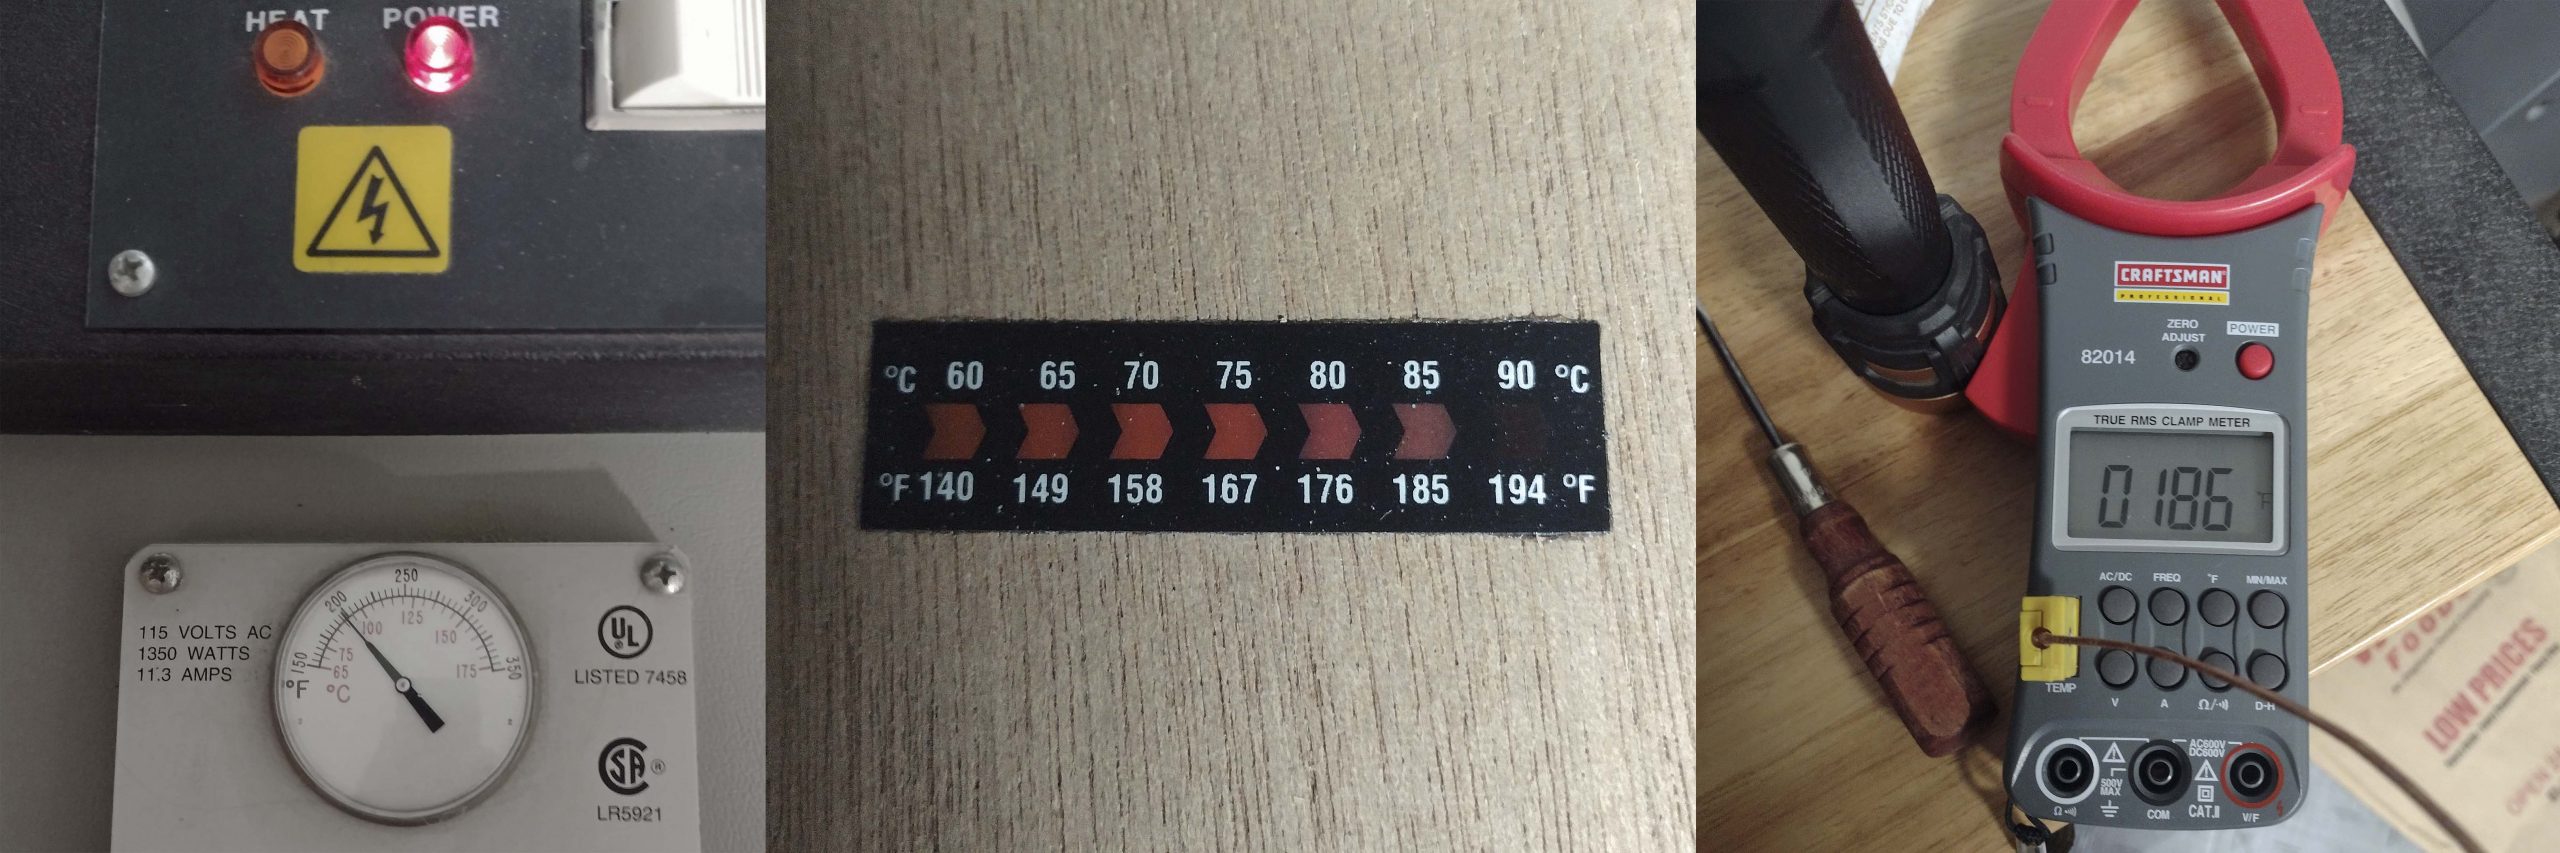
In theory, when the press has reached the temperature set by the control dial, the orange “heat” lamp goes out and the red “power” light stays on. When you add new material or the press cools down, you will see the orange light cycle on and off. This particular unit has a problem. Adjusting the temperature dial does not result in that temperature, and the temperature gauge is wrong. I discovered this by using the long meat probe from my smoker and a temperature strip. I later additionally confirmed it with a multimeter that includes a temperature probe.
The picture below shows the issue. The control dial is set to 200, the temperature gauge is showing about 183, the “heat” lamp is out indicating the press has reached the desired temperature, my smoker probe is only showing 171, and the temperature strip is showing a temperature between 167 and 176. (The smoker probe is guaranteed accurate within 1.8 degrees.)
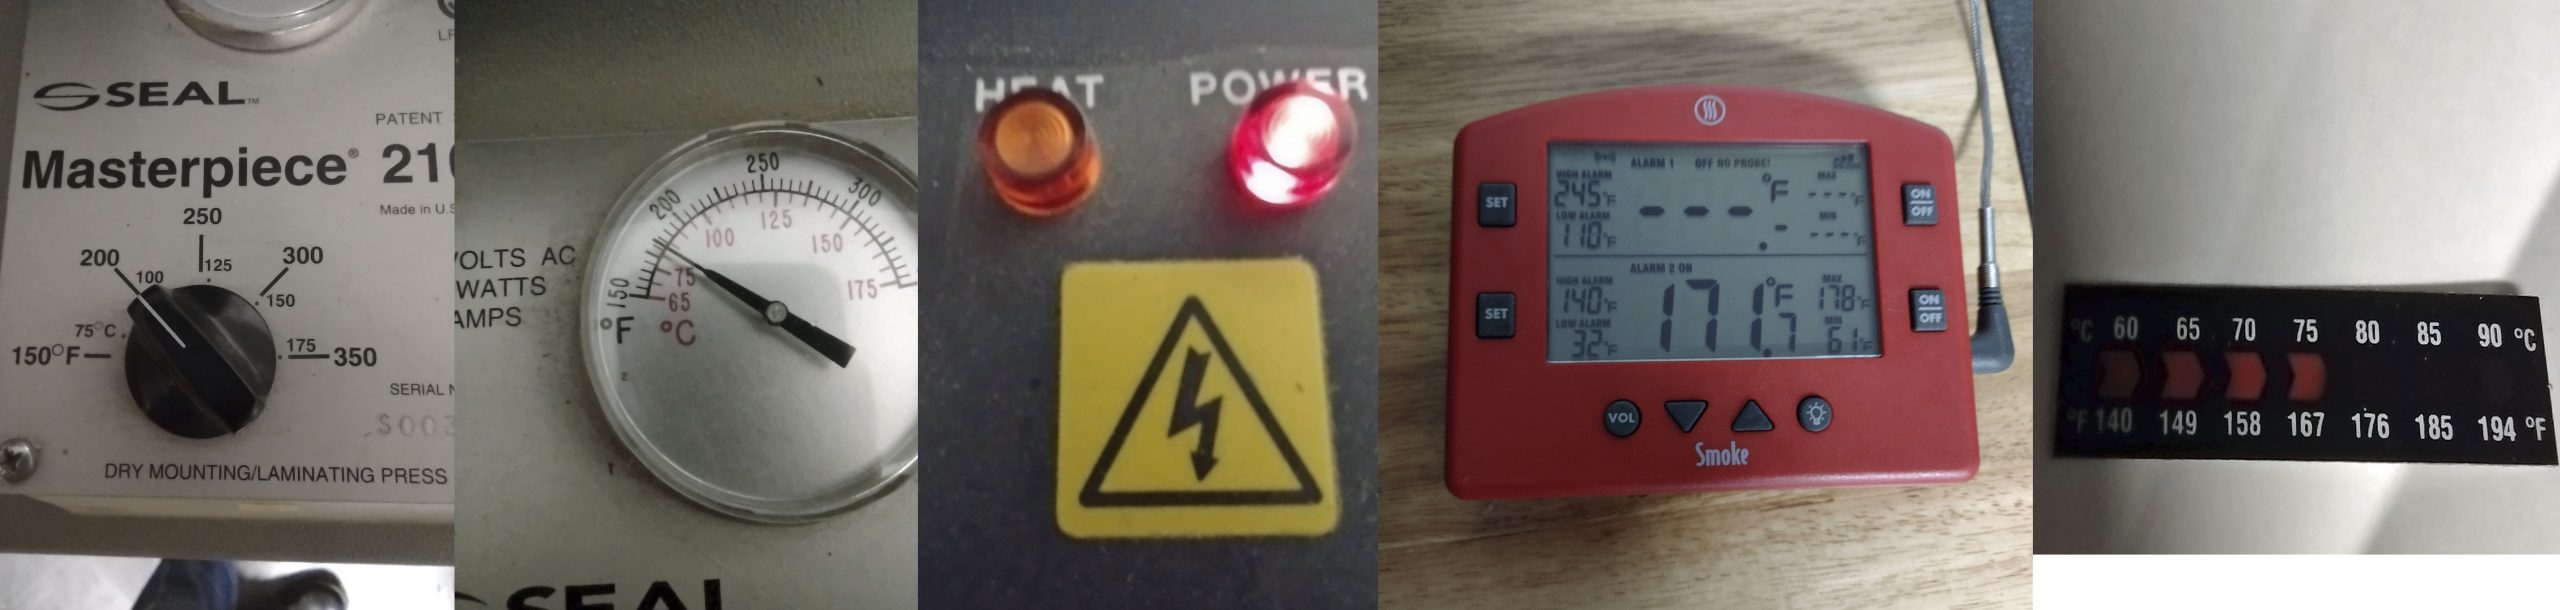
I use Fusion 4000 adhesive. It requires a minimum of 170 degrees to properly activate. So, basically the adhesive was not being heated enough to properly activate. You do not want to just crank up the temperature, because ink jet prints start to degrade over 200 degrees.
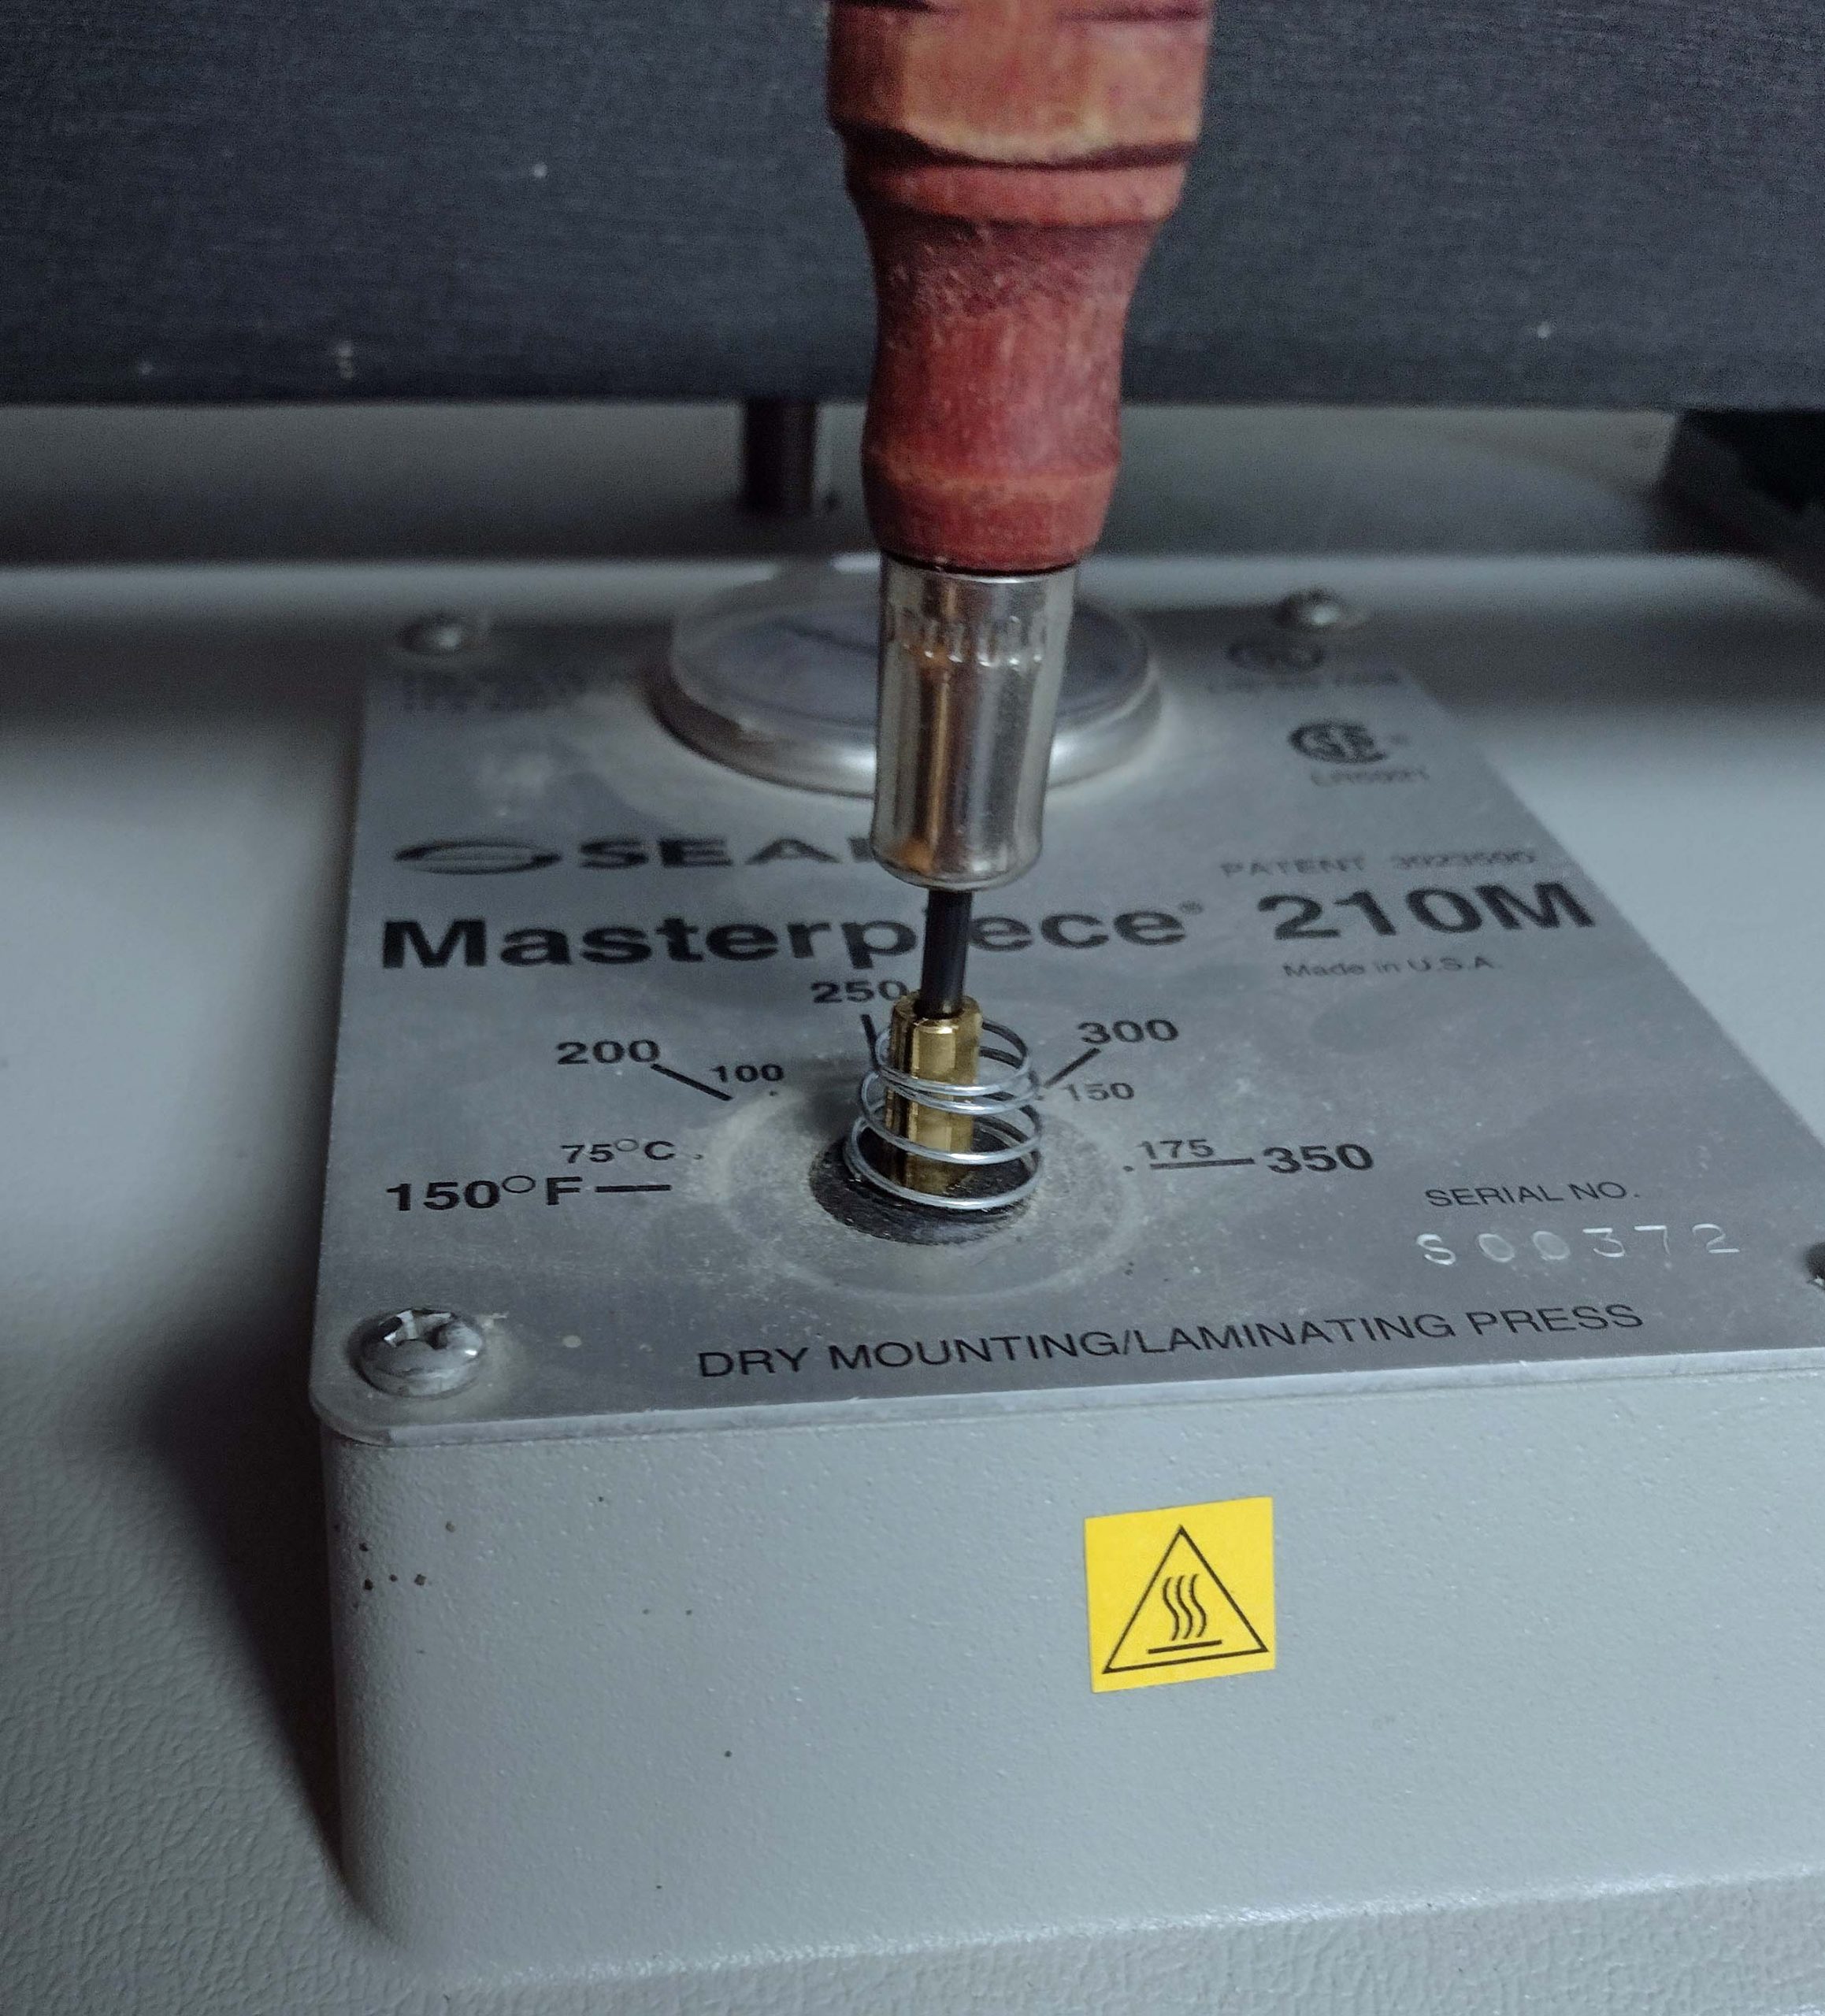
I found some directions in an internet forum on how to adjust the knob to be closer to the temperature gauge.
The way to do this is first remove the knob. Next with a small screwdriver adjust the small screw in the center of the knob shaft. Turn the small screw counterclockwise to increase the temp setting and clockwise to decrease the temp setting. Small increments can make quite a difference in temperature…try 1/8 turn to start and then after the temp stabilizes see whether the set temperature agrees with the indicated temperature.
I messed around with this for almost an hour. It takes a small diameter screwdriver with a blade that is at least 2″ long. The words “small increments” are a huge understatement. I was able to get the dial indicator closer to the indicated temperature, but they are still different. I finally decided it was not really worth any more effort, as the indicated temperature is still wrong no matter if the dial agrees or not.
For my next project, I used the temperature strip and my multimeter with a temperature probe to verify the temperature of the press. The temperature gauge on the press indicated about 198, the temperature strip indicated between 185 and 194, and the multimeter indicated 186. I could buy replacement parts, but now that I know about the issue, I can just check it like this.
Moral of the story is to verify the temperature of your press!
Adjusting the Clamping Pressure
The cam locking system develops a total clamping pressure of 1200 pounds if correctly adjusted. That works out to a couple of pounds per square inch if you have a project as big as the platen. It is more than that for smaller projects. That should be more than sufficient. If you want more clamping pressure than that, you will probably need to get a vacuum press.
To adjust the clamping pressure, you need to first load the materials to be mounted into the press. Close the press, but do not apply pressure by locking it. If it is adjusted properly, the lever arms should be at a 45-degree angle. Refer to the scanned pages of the Owner’s Manual below on how to make the adjustment.

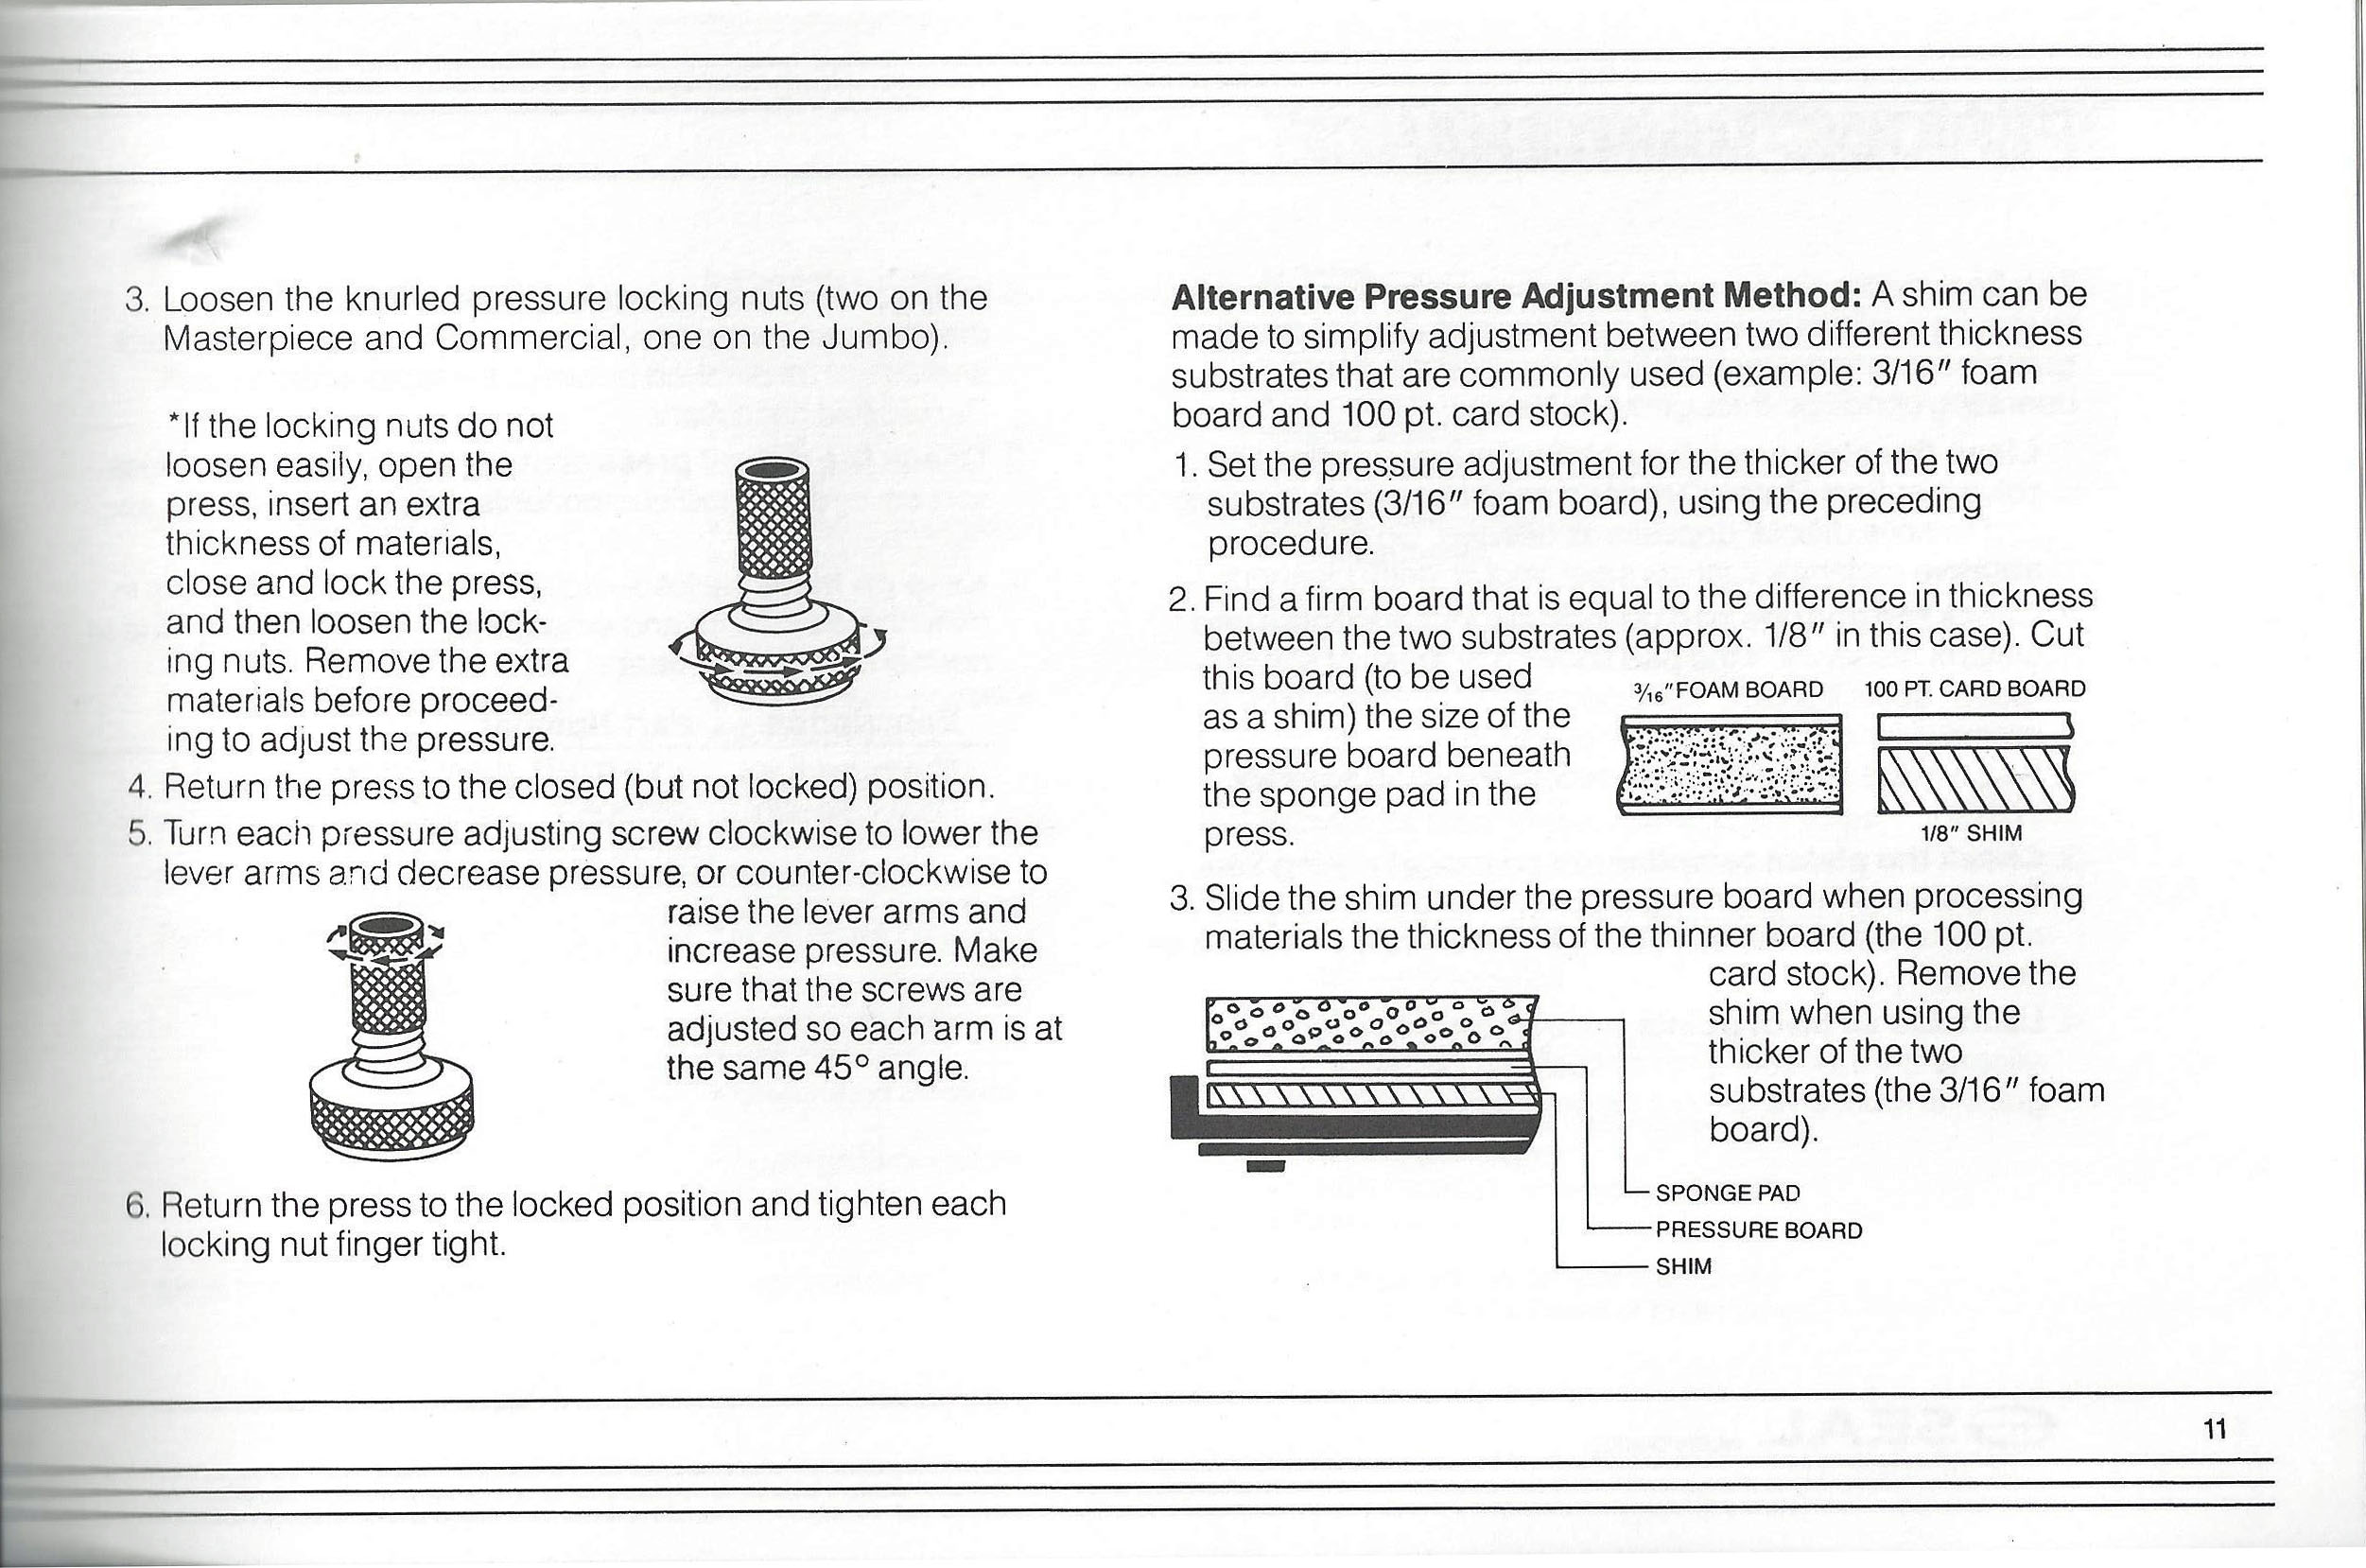
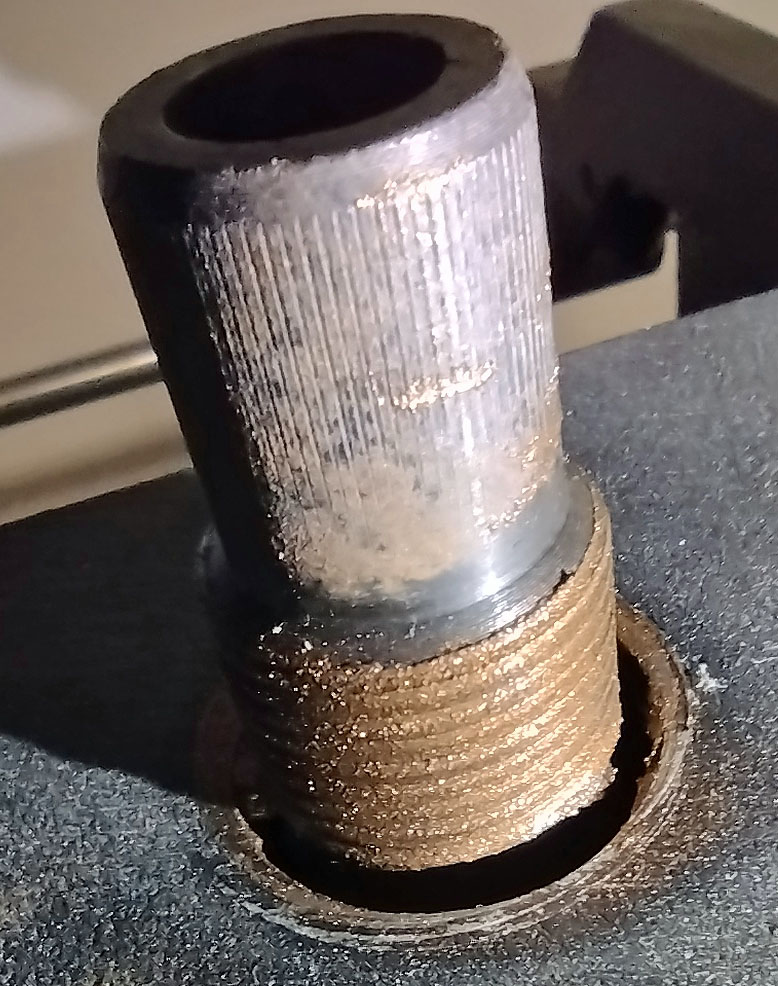
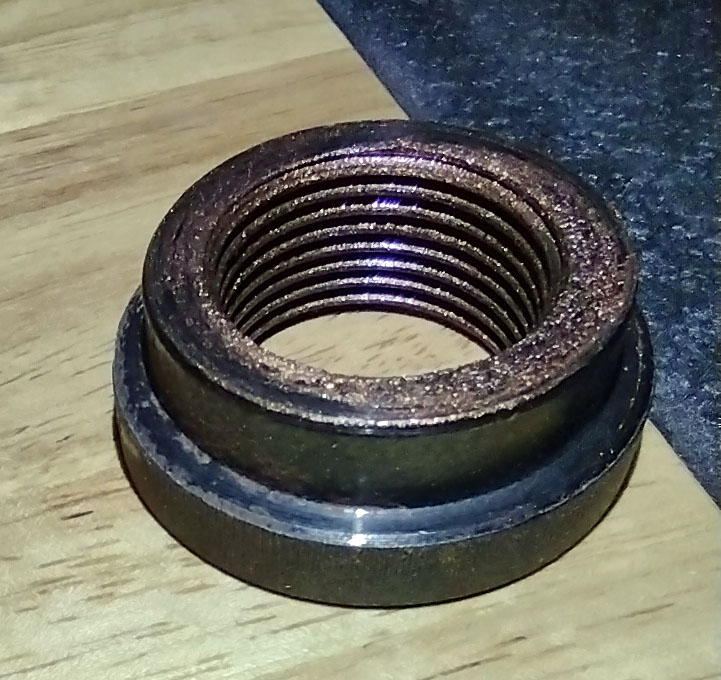
This is where I recently ran into an issue. The locking nuts had corroded onto the pressure adjusting screws. The asterisked direction above to lock the press to remove the pressure on the locking nuts did not work. I had to use some pliers to get them to come loose. I kept the press closed and completely removed the locking nuts. It was a battle most of the way.
I then used a wire brush and a small wire wheel in a Dremel type rotary tool to remove as much corrosion as possible from the threads of both the adjusting screws and the locking nuts. (If you do this, make sure to collect all the debris to keep from contaminating future projects!) To prevent future problems, I coated the threads with anti-seize before reassembling. (Note that this is not included or recommended in the owner’s manual anywhere.) The anti-seize I had in my shop was the high temperature variety and is gold in color.
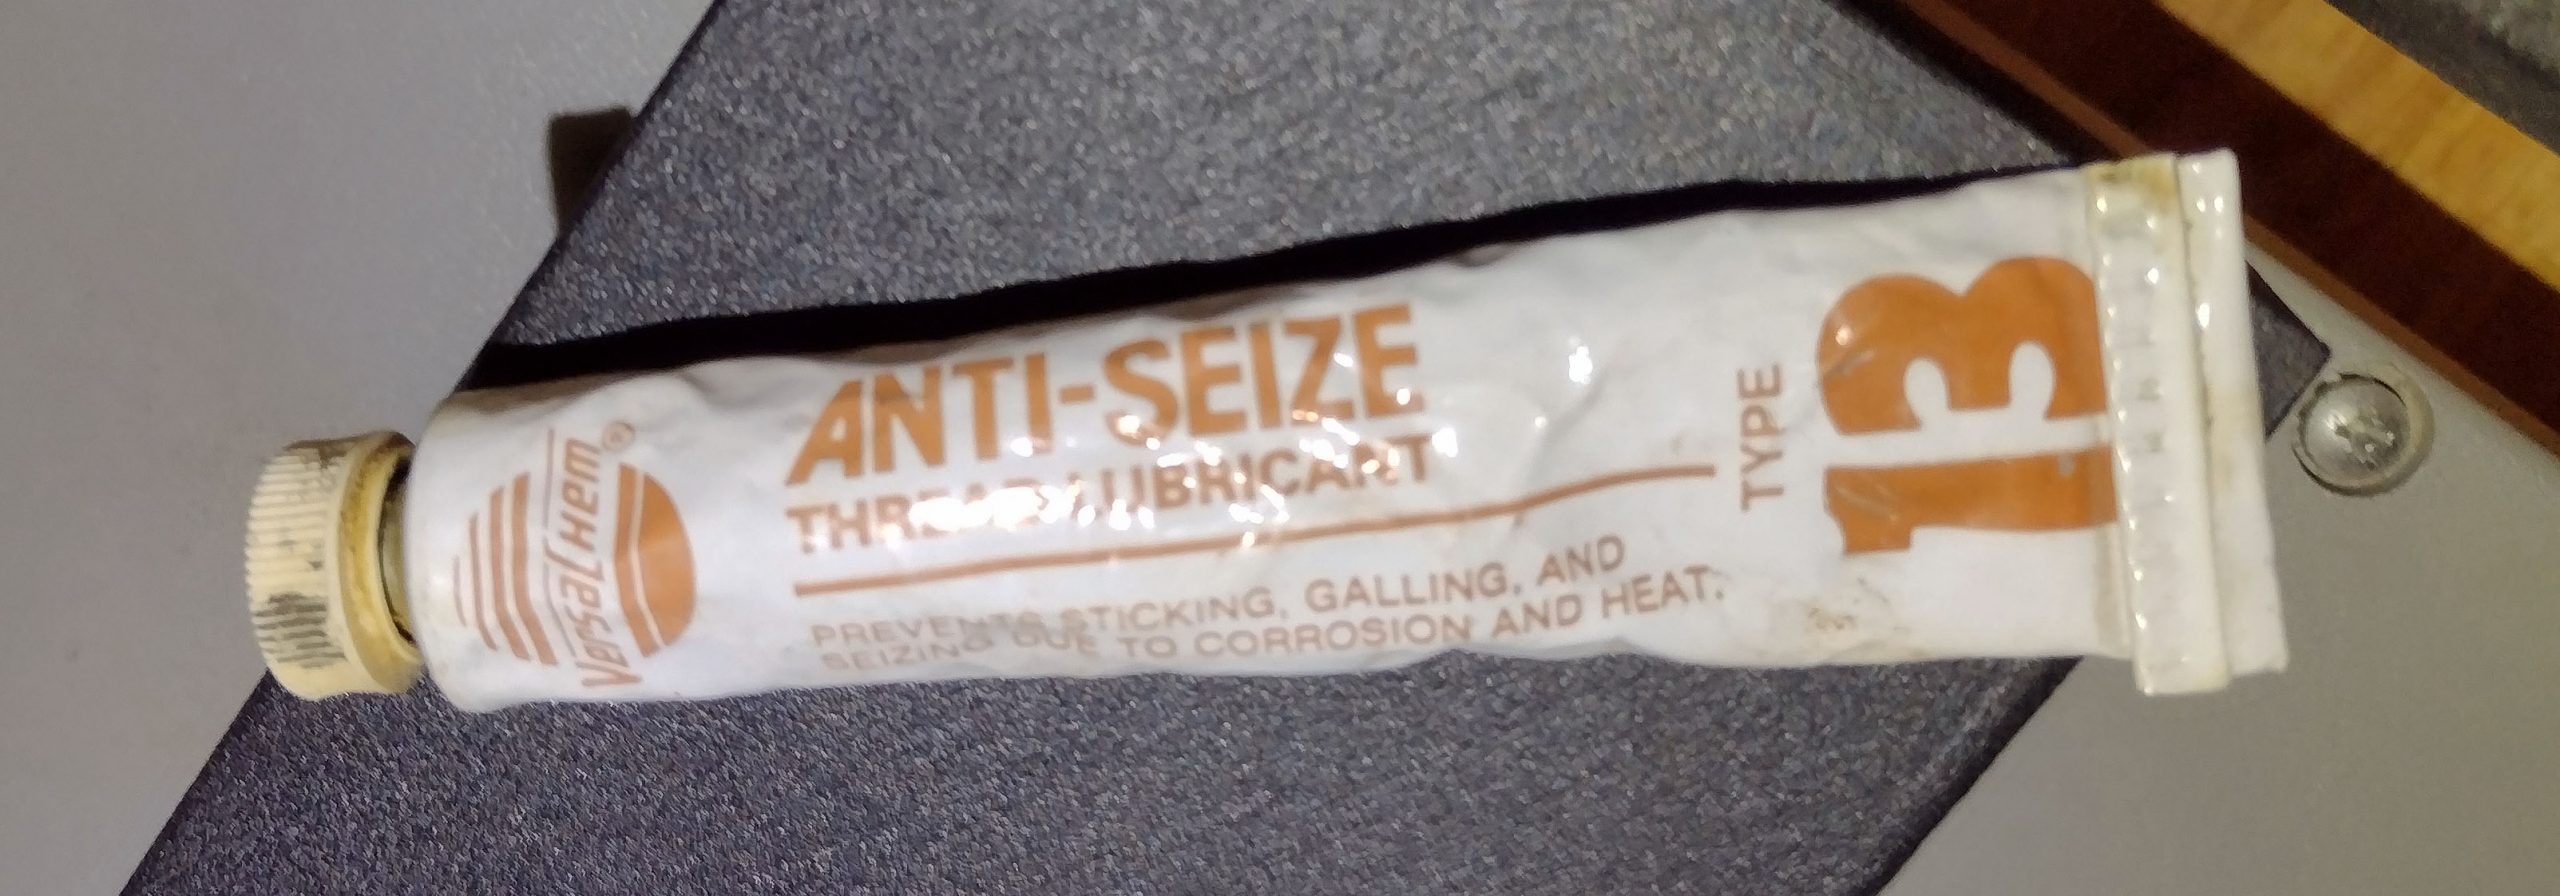
A note of caution. This stuff goes everywhere. I once heard someone joke that if you use anti-seize, even after you take a shower you will wake up in the morning with your pillowcase coated with this stuff. Be warned!
So, how often do you need to adjust the clamping pressure? If you set it and keep using the same materials, probably never! But, as you experiment and change your backing material thickness, you should check it every time.
For the picture below, the setting has not changed between three different thicknesses of plywood. The leftmost image is nominal 1/4″ Cherry Appleply, the middle image is 6mm okoume plywood, and the right side is nominal 1/2″ cabinet grade maple plywood.
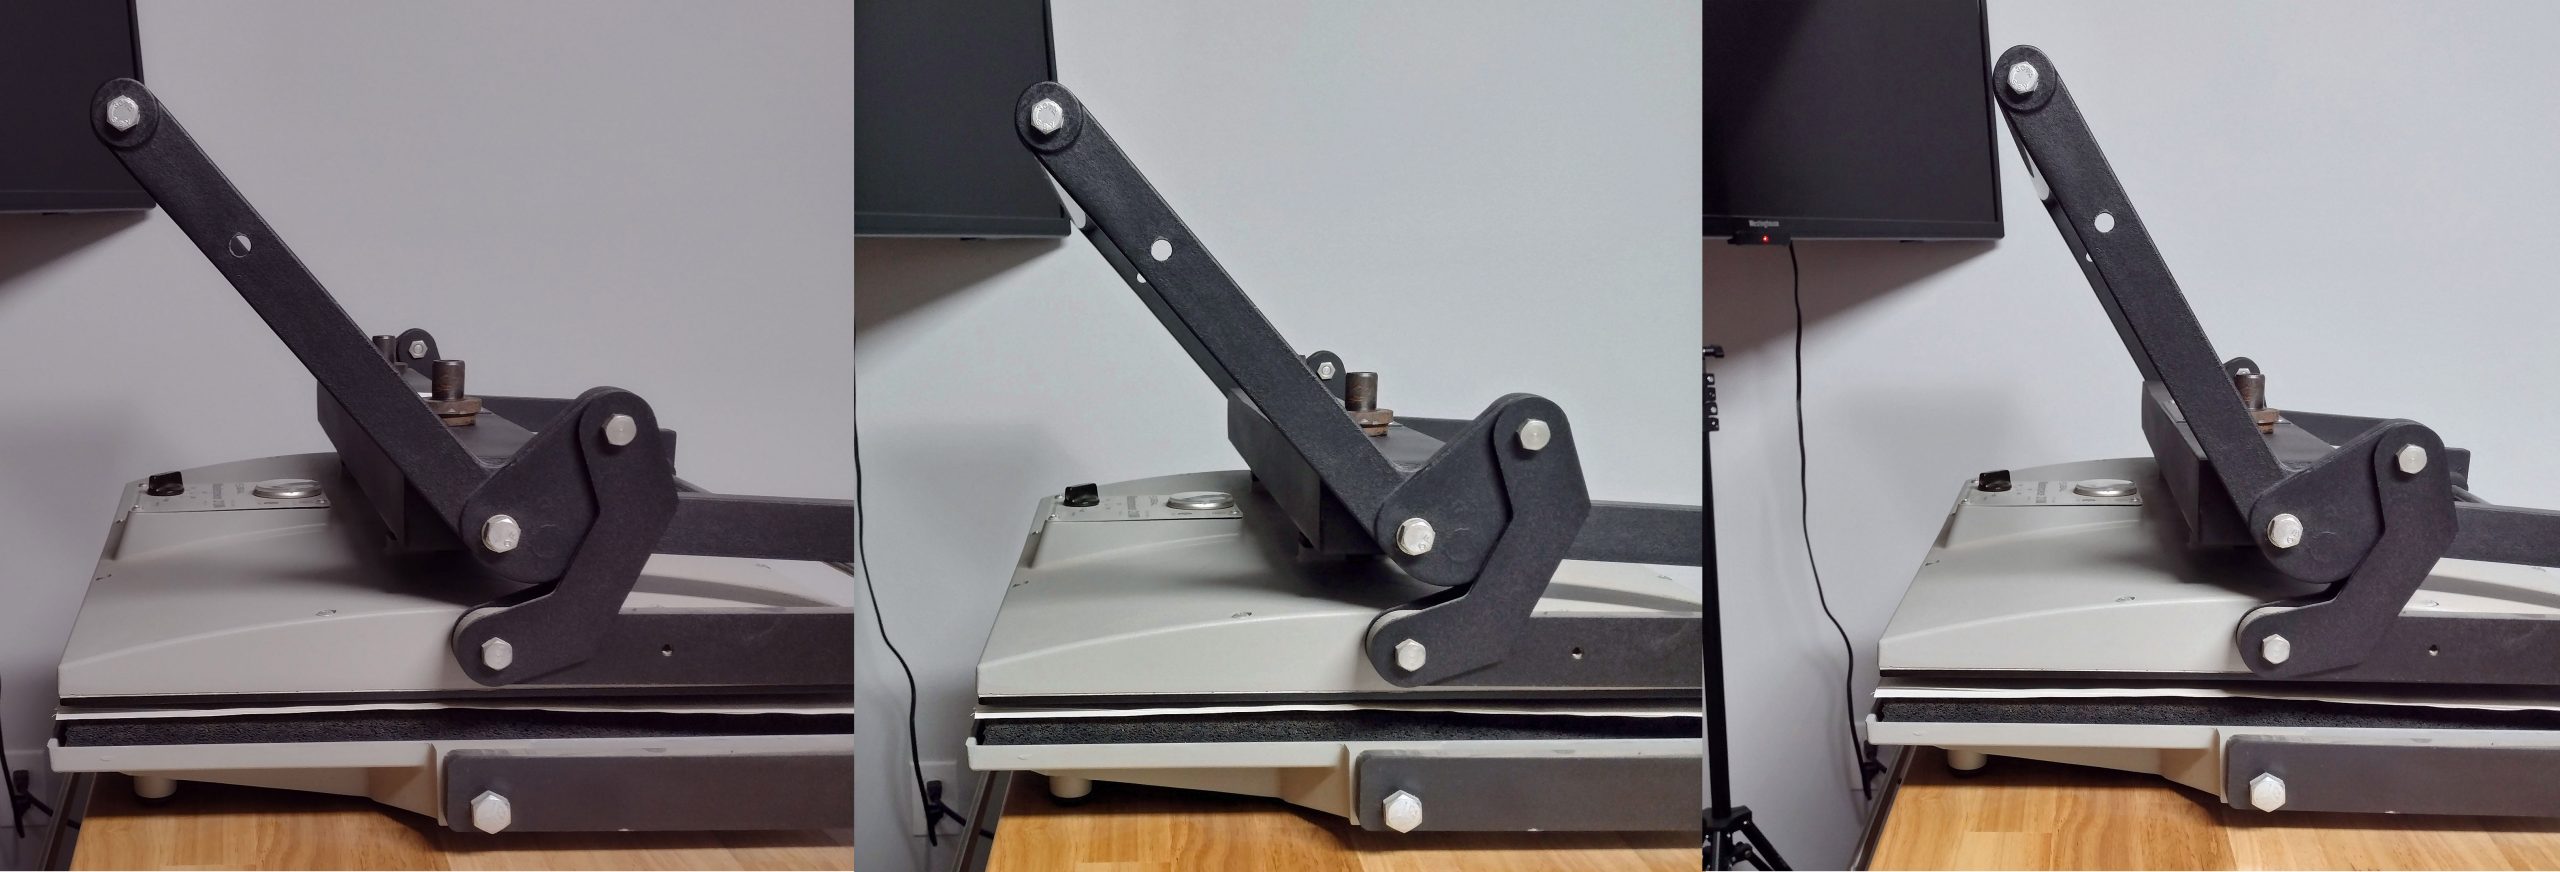
The difference between the left and right images is pretty clear. The adjustment screws need to be adjusted to achieve the correct pressure for the 1/2″ plywood. Actually, you may have a very difficult time closing the press like this.
Maintenance
The owner’s manual has a short list of recommended maintenance items.
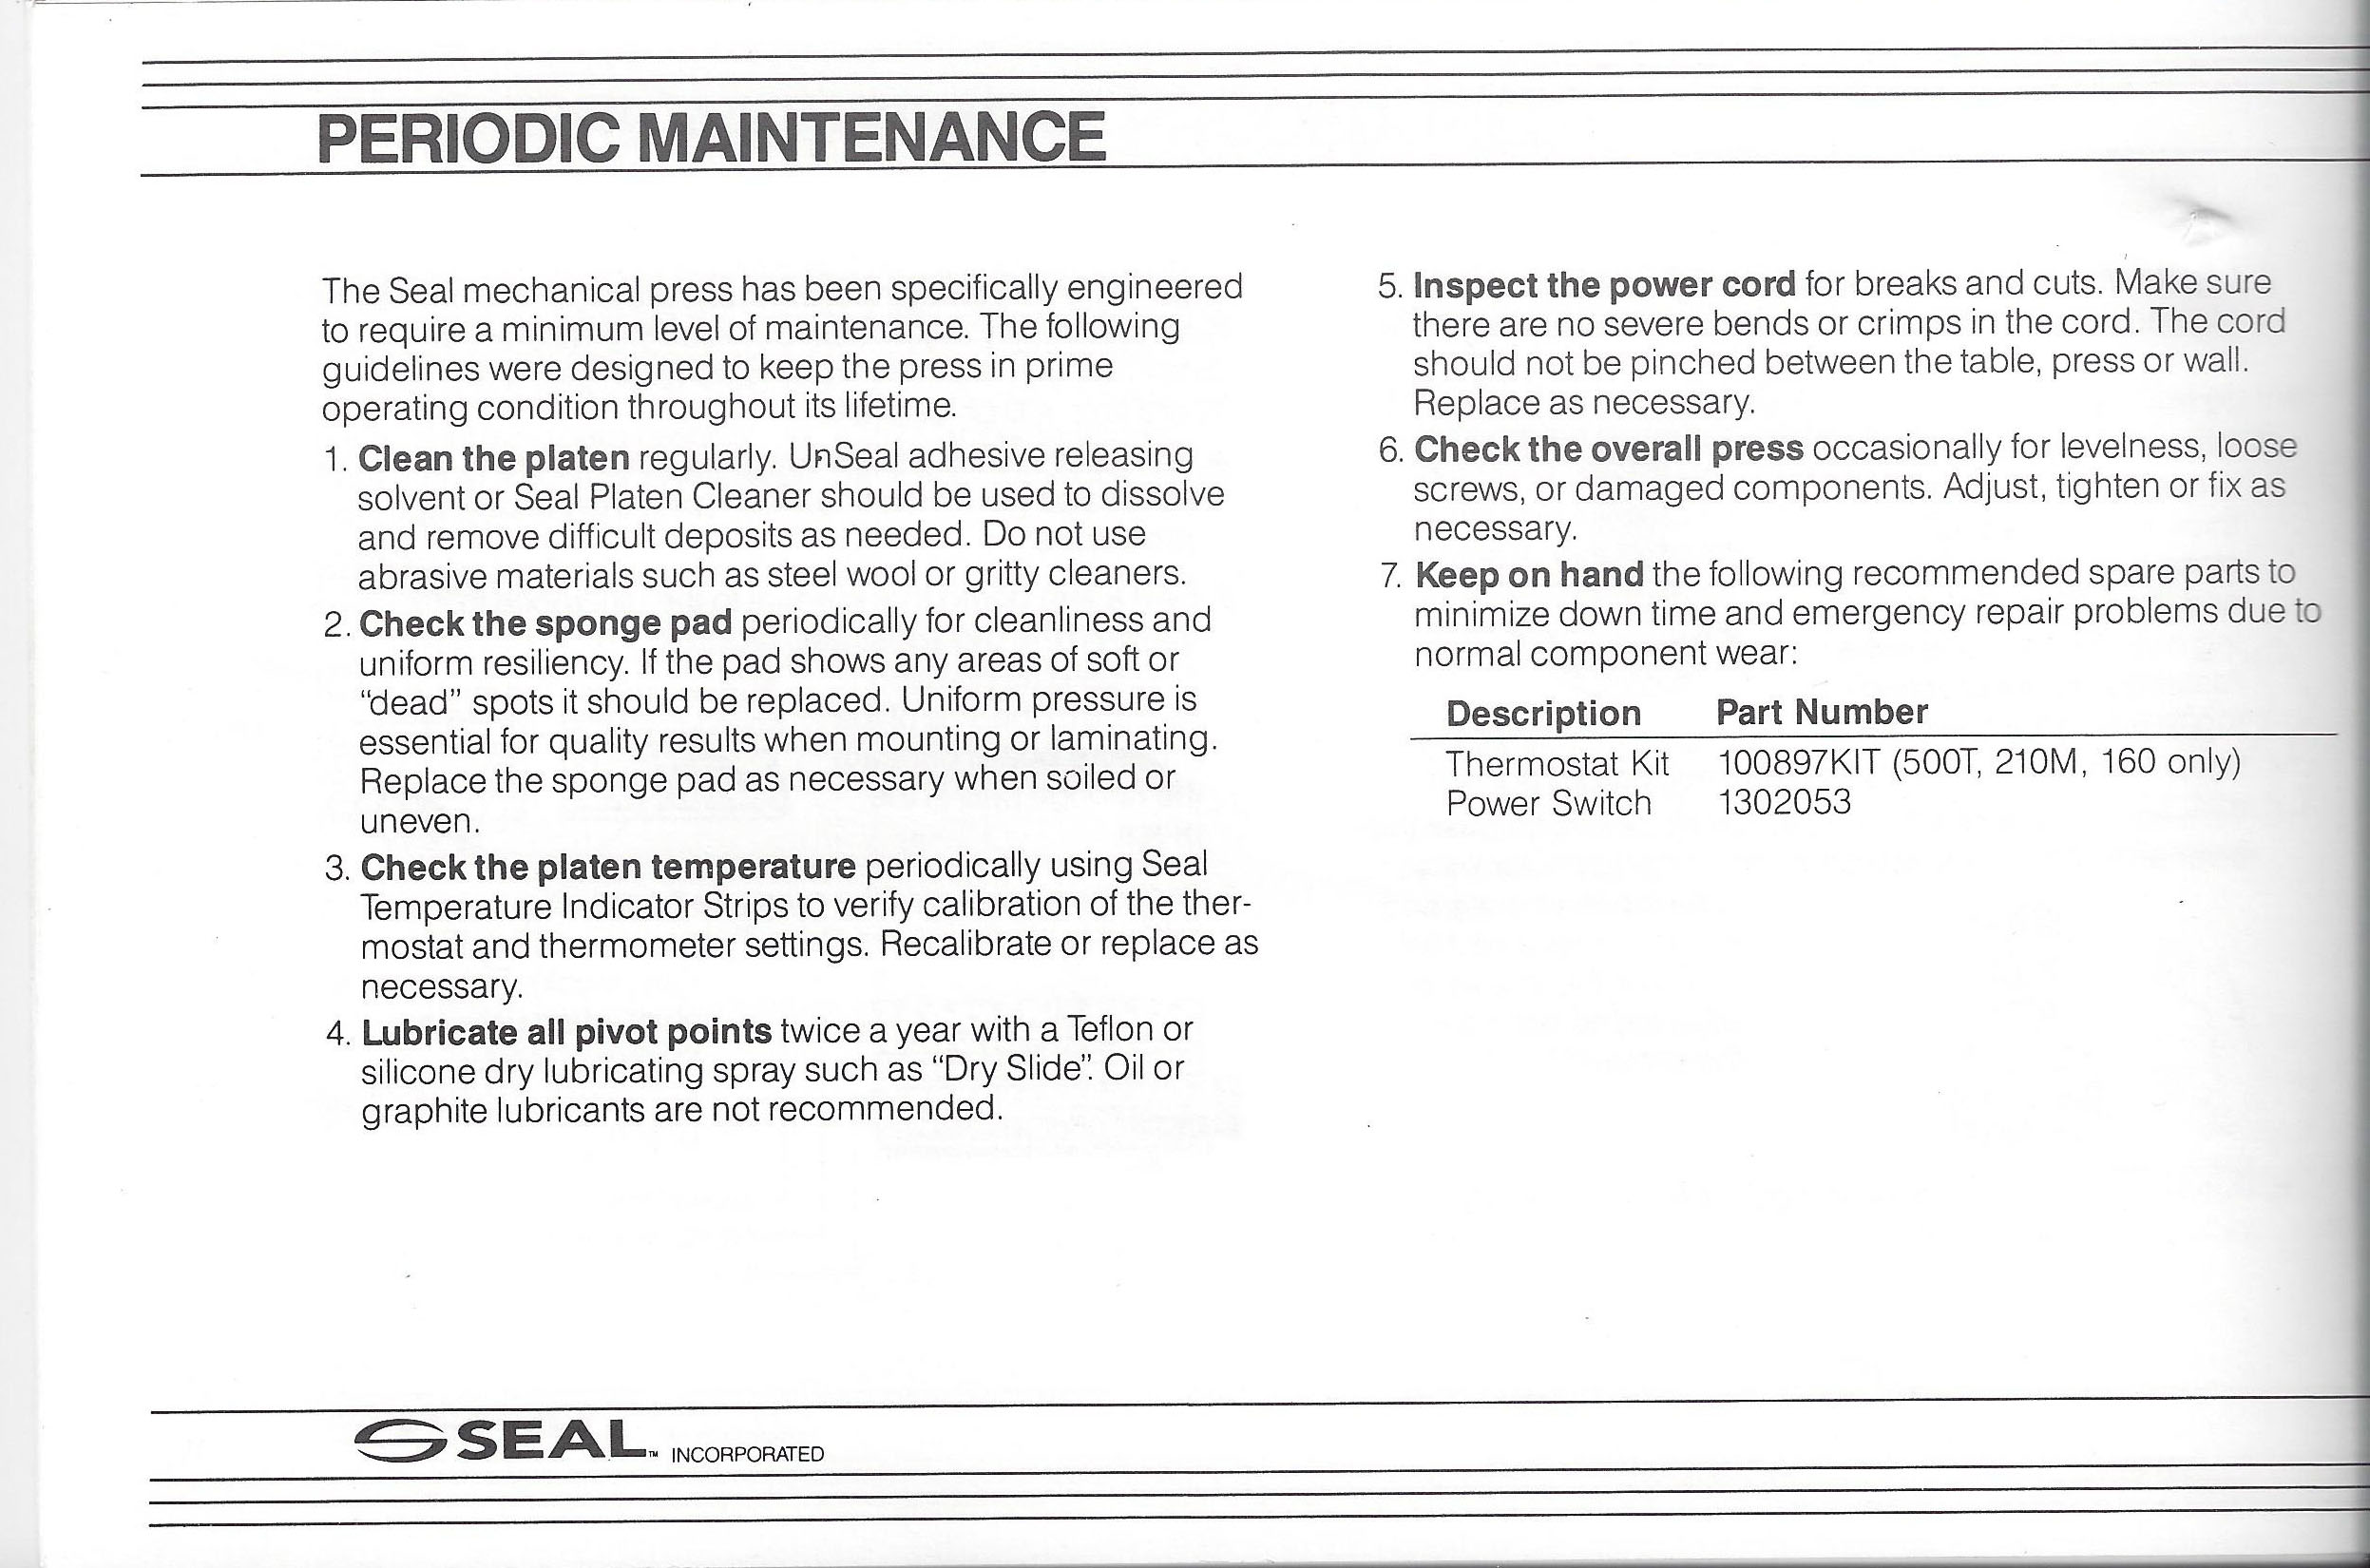
- Cleaning – the first one on the list is critical. The upper platen lifts when you open the press. It is a flat piece of steel. This is the piece of the press that heats up. If it has deposits or build ups on it, it can cause impressions in the surface of the mounted image. If you notice your mounted puzzle image has little divots in it, you probably need to go check the upper platen for smoothness. They make a cleaning solution for this.

This cleaning guidance also applies to the release paper. The press is loaded from bottom to top with:
- release paper
- plywood
- adhesive
- printed image
- release paper
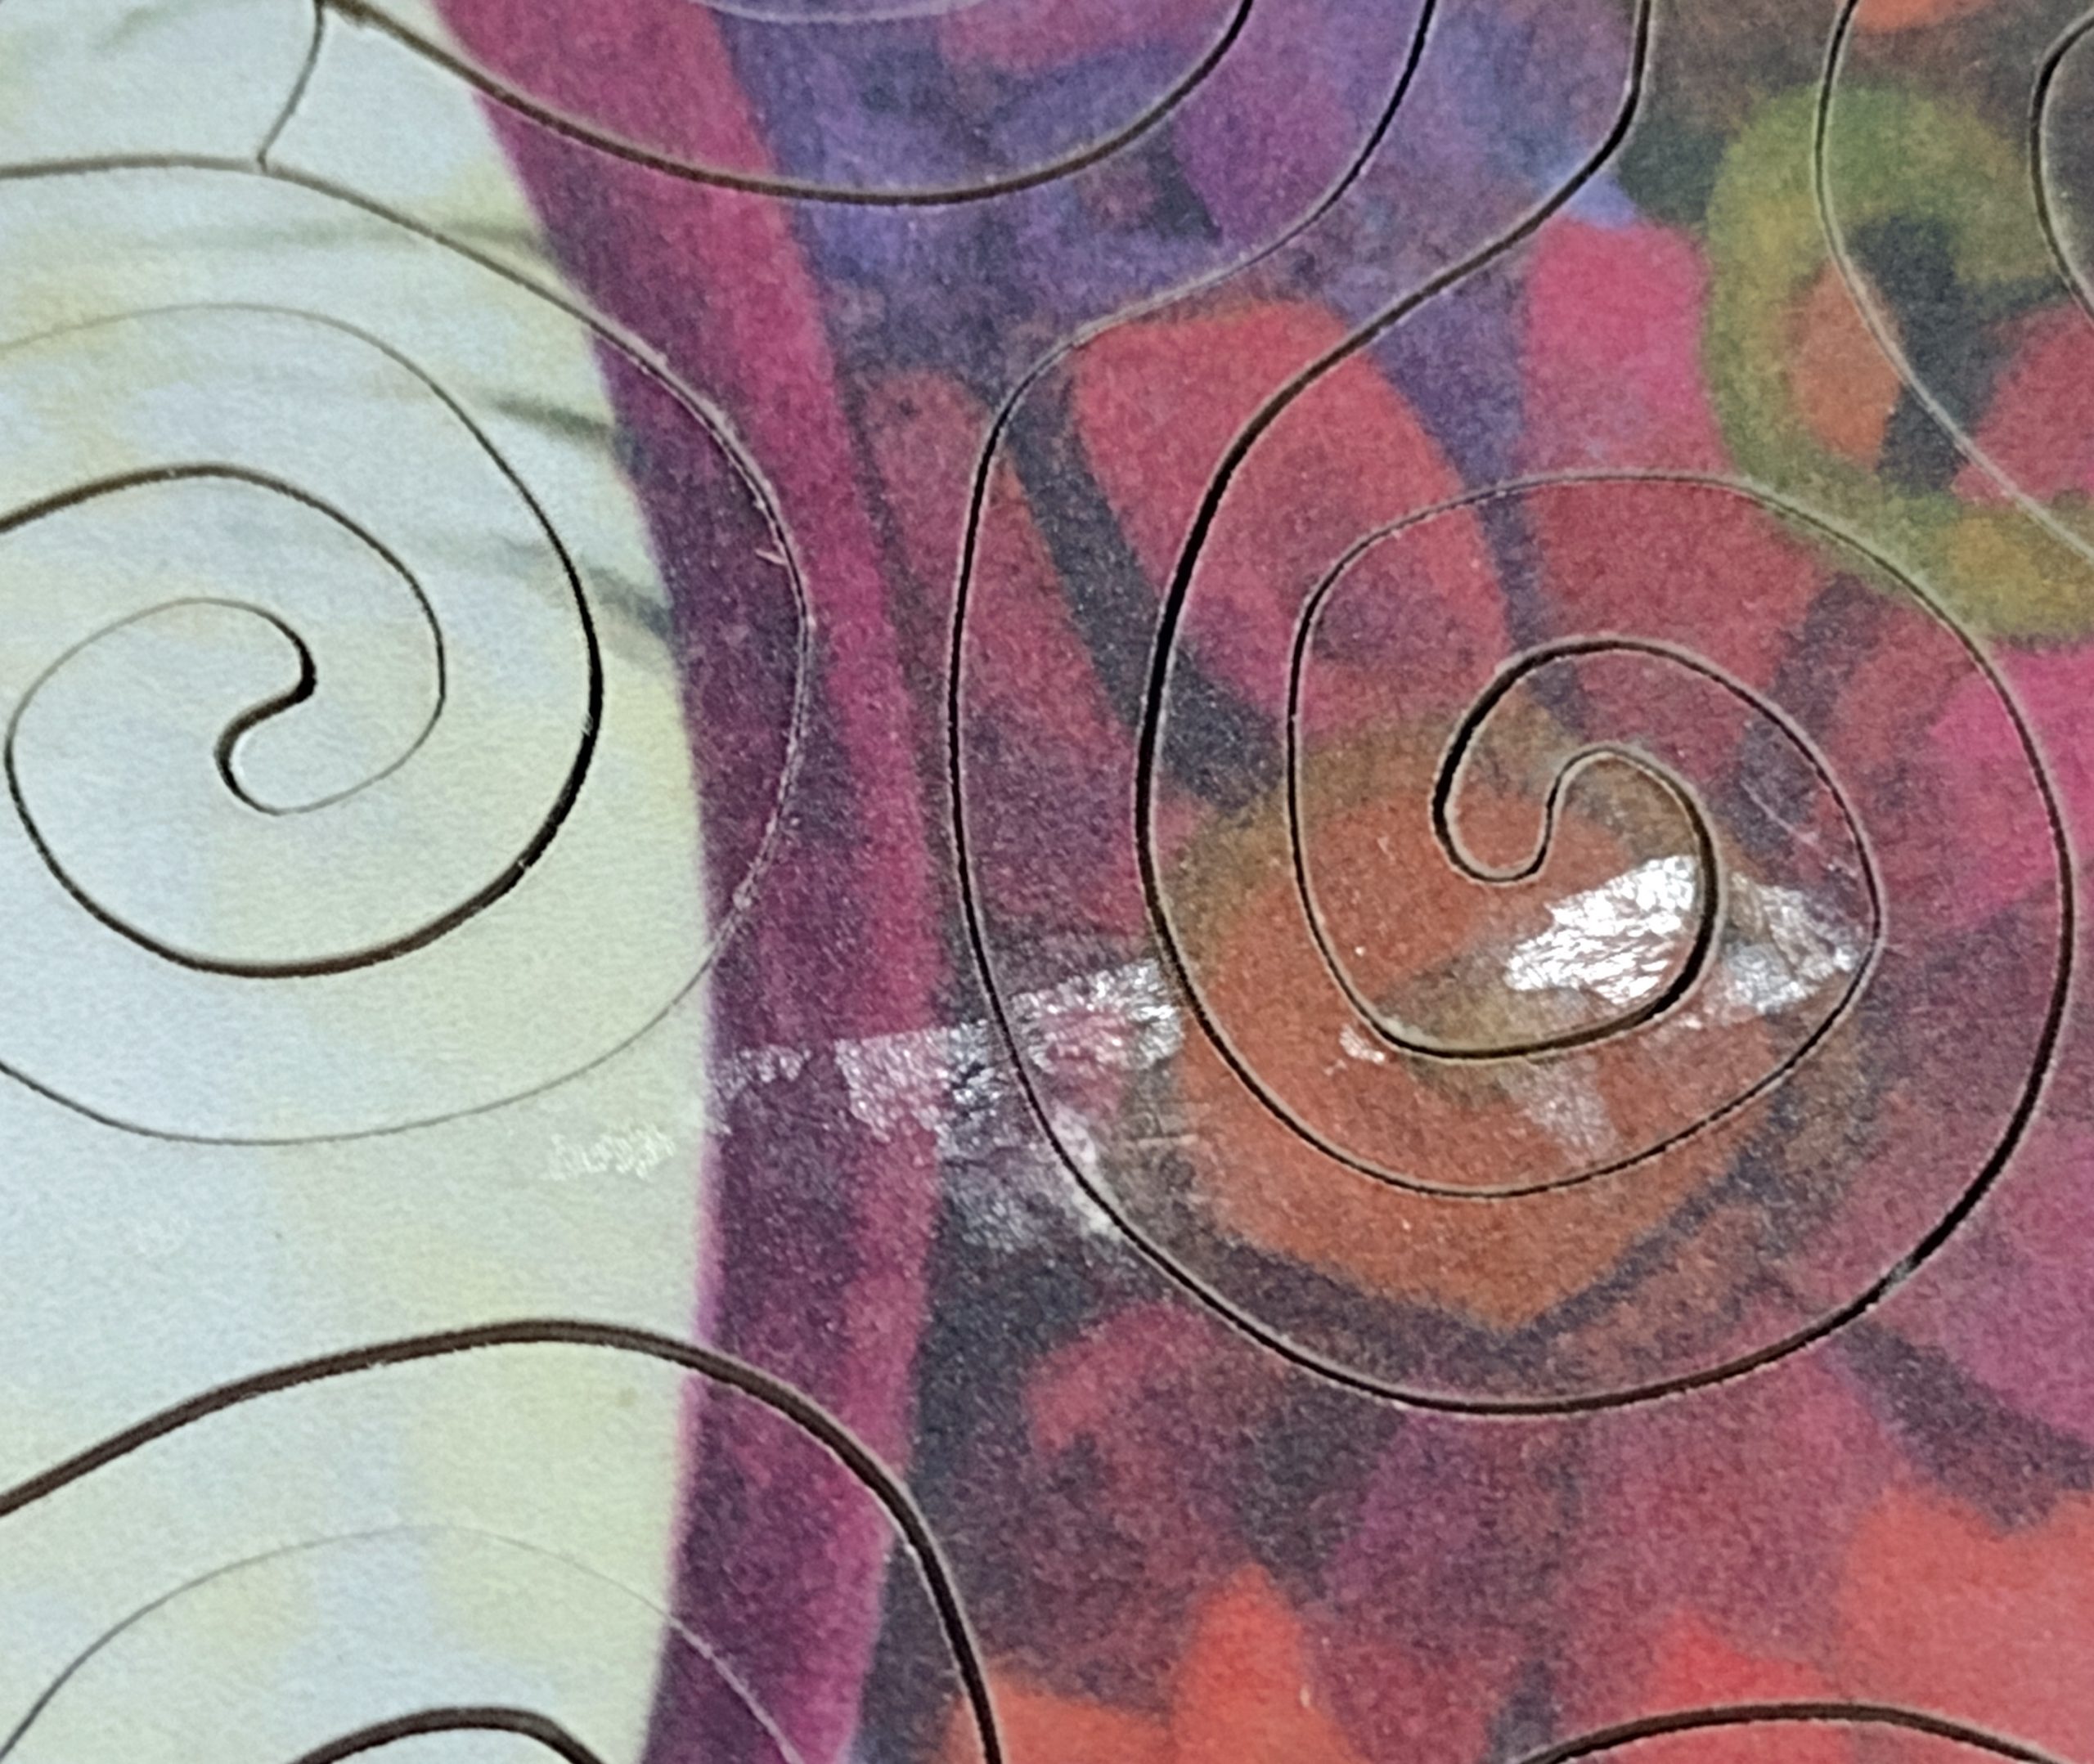
If the platen has any bumps on it, those bumps will press through the top piece of release paper and put a dimple in the image. If the top piece of release paper has any residual adhesive from the last project, that adhesive will melt into the image and ruin it. Here is an example of this.
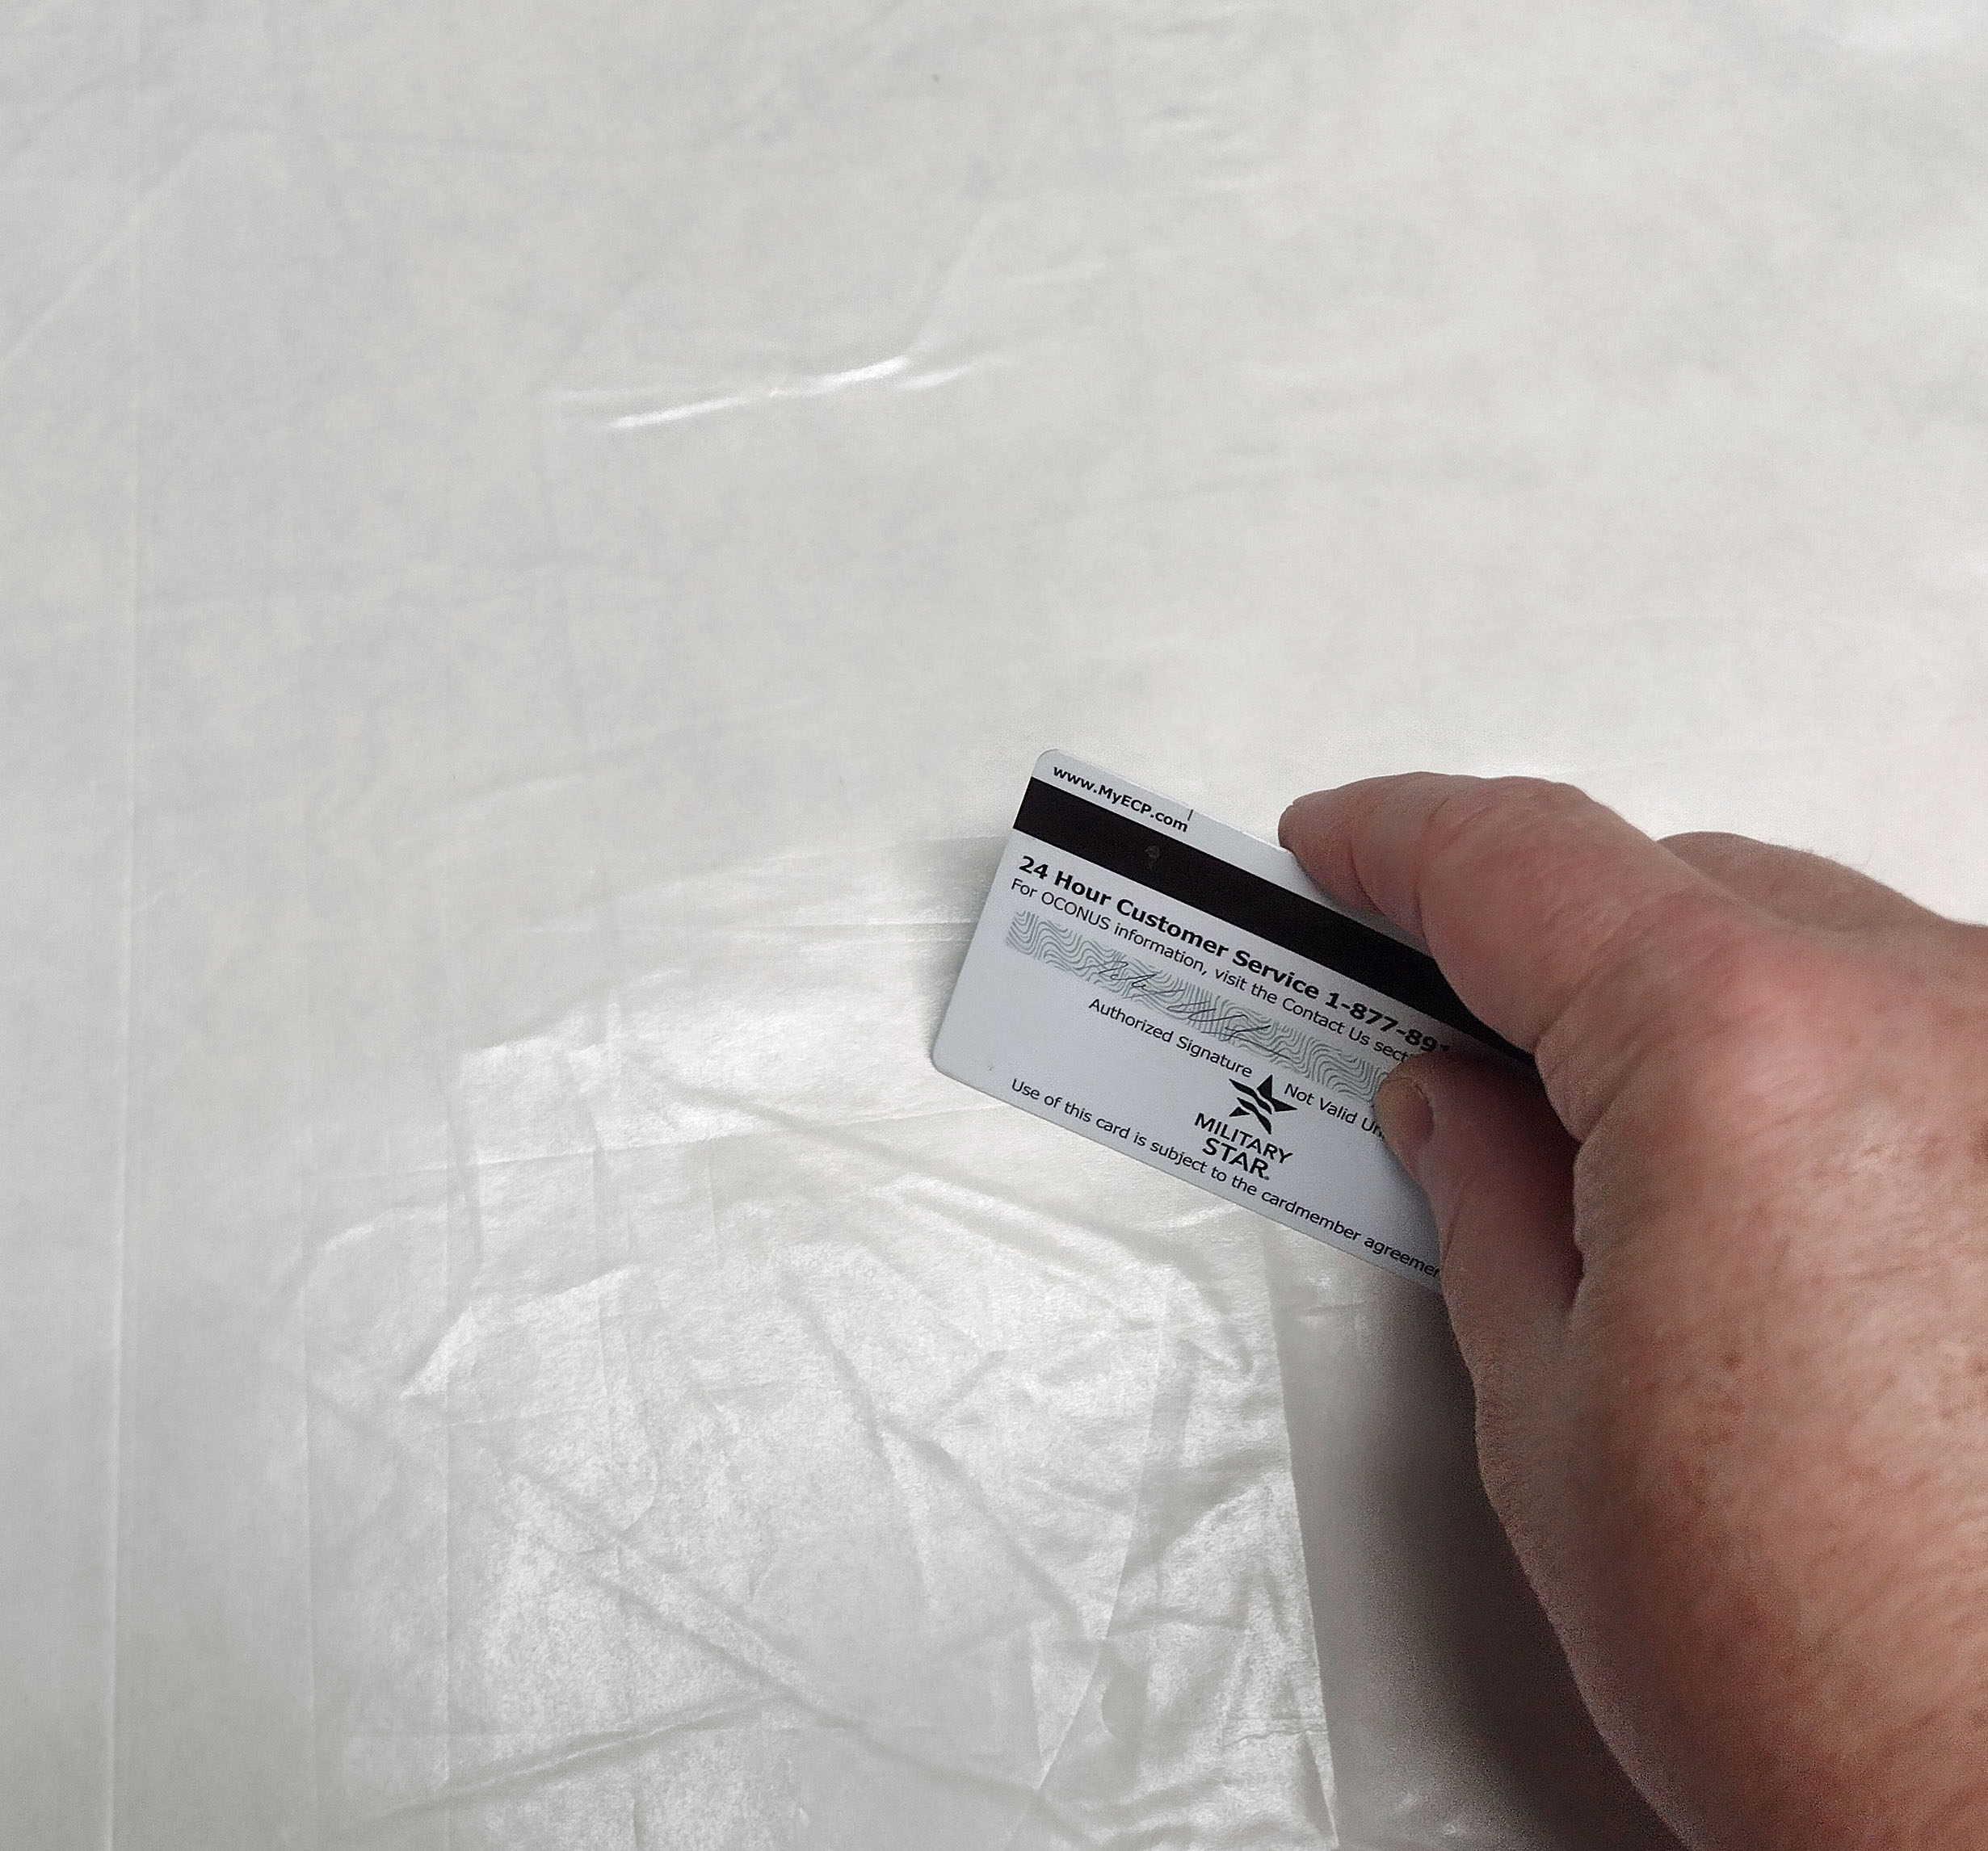
I now scrape the release paper between each project with an expired credit card. School of hard knocks here.
2. Check the sponge pad. On the bottom of the press is a thick sponge pad the size of the platens. It is relatively heavy. The material can begin to degrade with time. For people who are mounting prints to foam board to put in a picture frame, soft spots can cause uneven pressure across the image when clamping. Uneven pressure can lead to poor adhesion. In our case, where we are mounting prints to plywood, I do not see it as a critical issue. I have checked mine and it is fine. That is a good thing, as the replacement pads are about $140.00. Something to consider if you are looking at purchasing a used press.
3. Check the temperature – I have already beat this topic to death. It does say to use Seal Temperature Indicator Strips, but I found some other brand online. You just need to pick some that cover the temperature range you want. These came with a sticky back. I attached one to a piece of scrap plywood and throw it in the press when warming it up to do a quick temperature check.
4/5/6. No real discussion needed. I did find a loose nut on one of the pivot points once.
I sat down to write a short entry about the dry mount press and ended up writing another small booklet! If you have managed to read through the entire thing, I hope you find it helpful.
My owner’s manual came with my press when I bought it. It was printed in 1990. I found a newer one online from 2005. It was while they were labeled as Bienfang and owned by Elmers Glue! Everything is pretty much the same other than being reformatted and the name change. Here is the link to that. Bienfang Owner’s Manual.
As always, happy puzzling!
Bob